Shopify gives each variant one image. This feature lets several photos belong to each option value, and hides the rest of the gallery when a shopper picks that value.
There are two ways to tell Swatchfy which photo belongs to which value. Read this section before you start — picking the wrong one is the most common reason this feature seems not to work.
Use your Shopify media order | Assign images in Swatchfy | |
Where you do the work | In Shopify, on the product's media | In Swatchfy, on the Assign images page |
Covers | Your whole catalogue at once | One product at a time |
Groups by | One option, chosen automatically | Any option, and as many as you like |
Needs from you | Photos already grouped by colour, and each variant's main image set | Nothing — drag and drop |
Best when | Your media is already tidy and you have hundreds of products | You want exact control, or your media order has to stay as it is |
Neither is more "correct". Most stores turn on the automatic method, then assign by hand only on the handful of products where it does not fit.
Assigning by hand wins, per product, all or nothing.
The moment a product has any assignment saved in Swatchfy, its Shopify media order is not consulted for that product at all — including for options you did not assign. Assign one colour on a product and the automatic grouping stops for that whole product, not just for the value you touched.
To hand a product back to the automatic method, open it and use Delete configuration. That removes the assignments in Swatchfy; the product and its images in Shopify are untouched.
Swatchfy → Settings → Use your Shopify variant images → Group by Shopify media order.
It applies to your whole catalogue at once. There is nothing to do per product.
Put each colour's photos together. All the black photos, then all the white photos. Not black-front, white-front, black-back.
Make each variant's main image the first photo of its group. This is the marker Swatchfy reads to know where one group ends and the next begins.
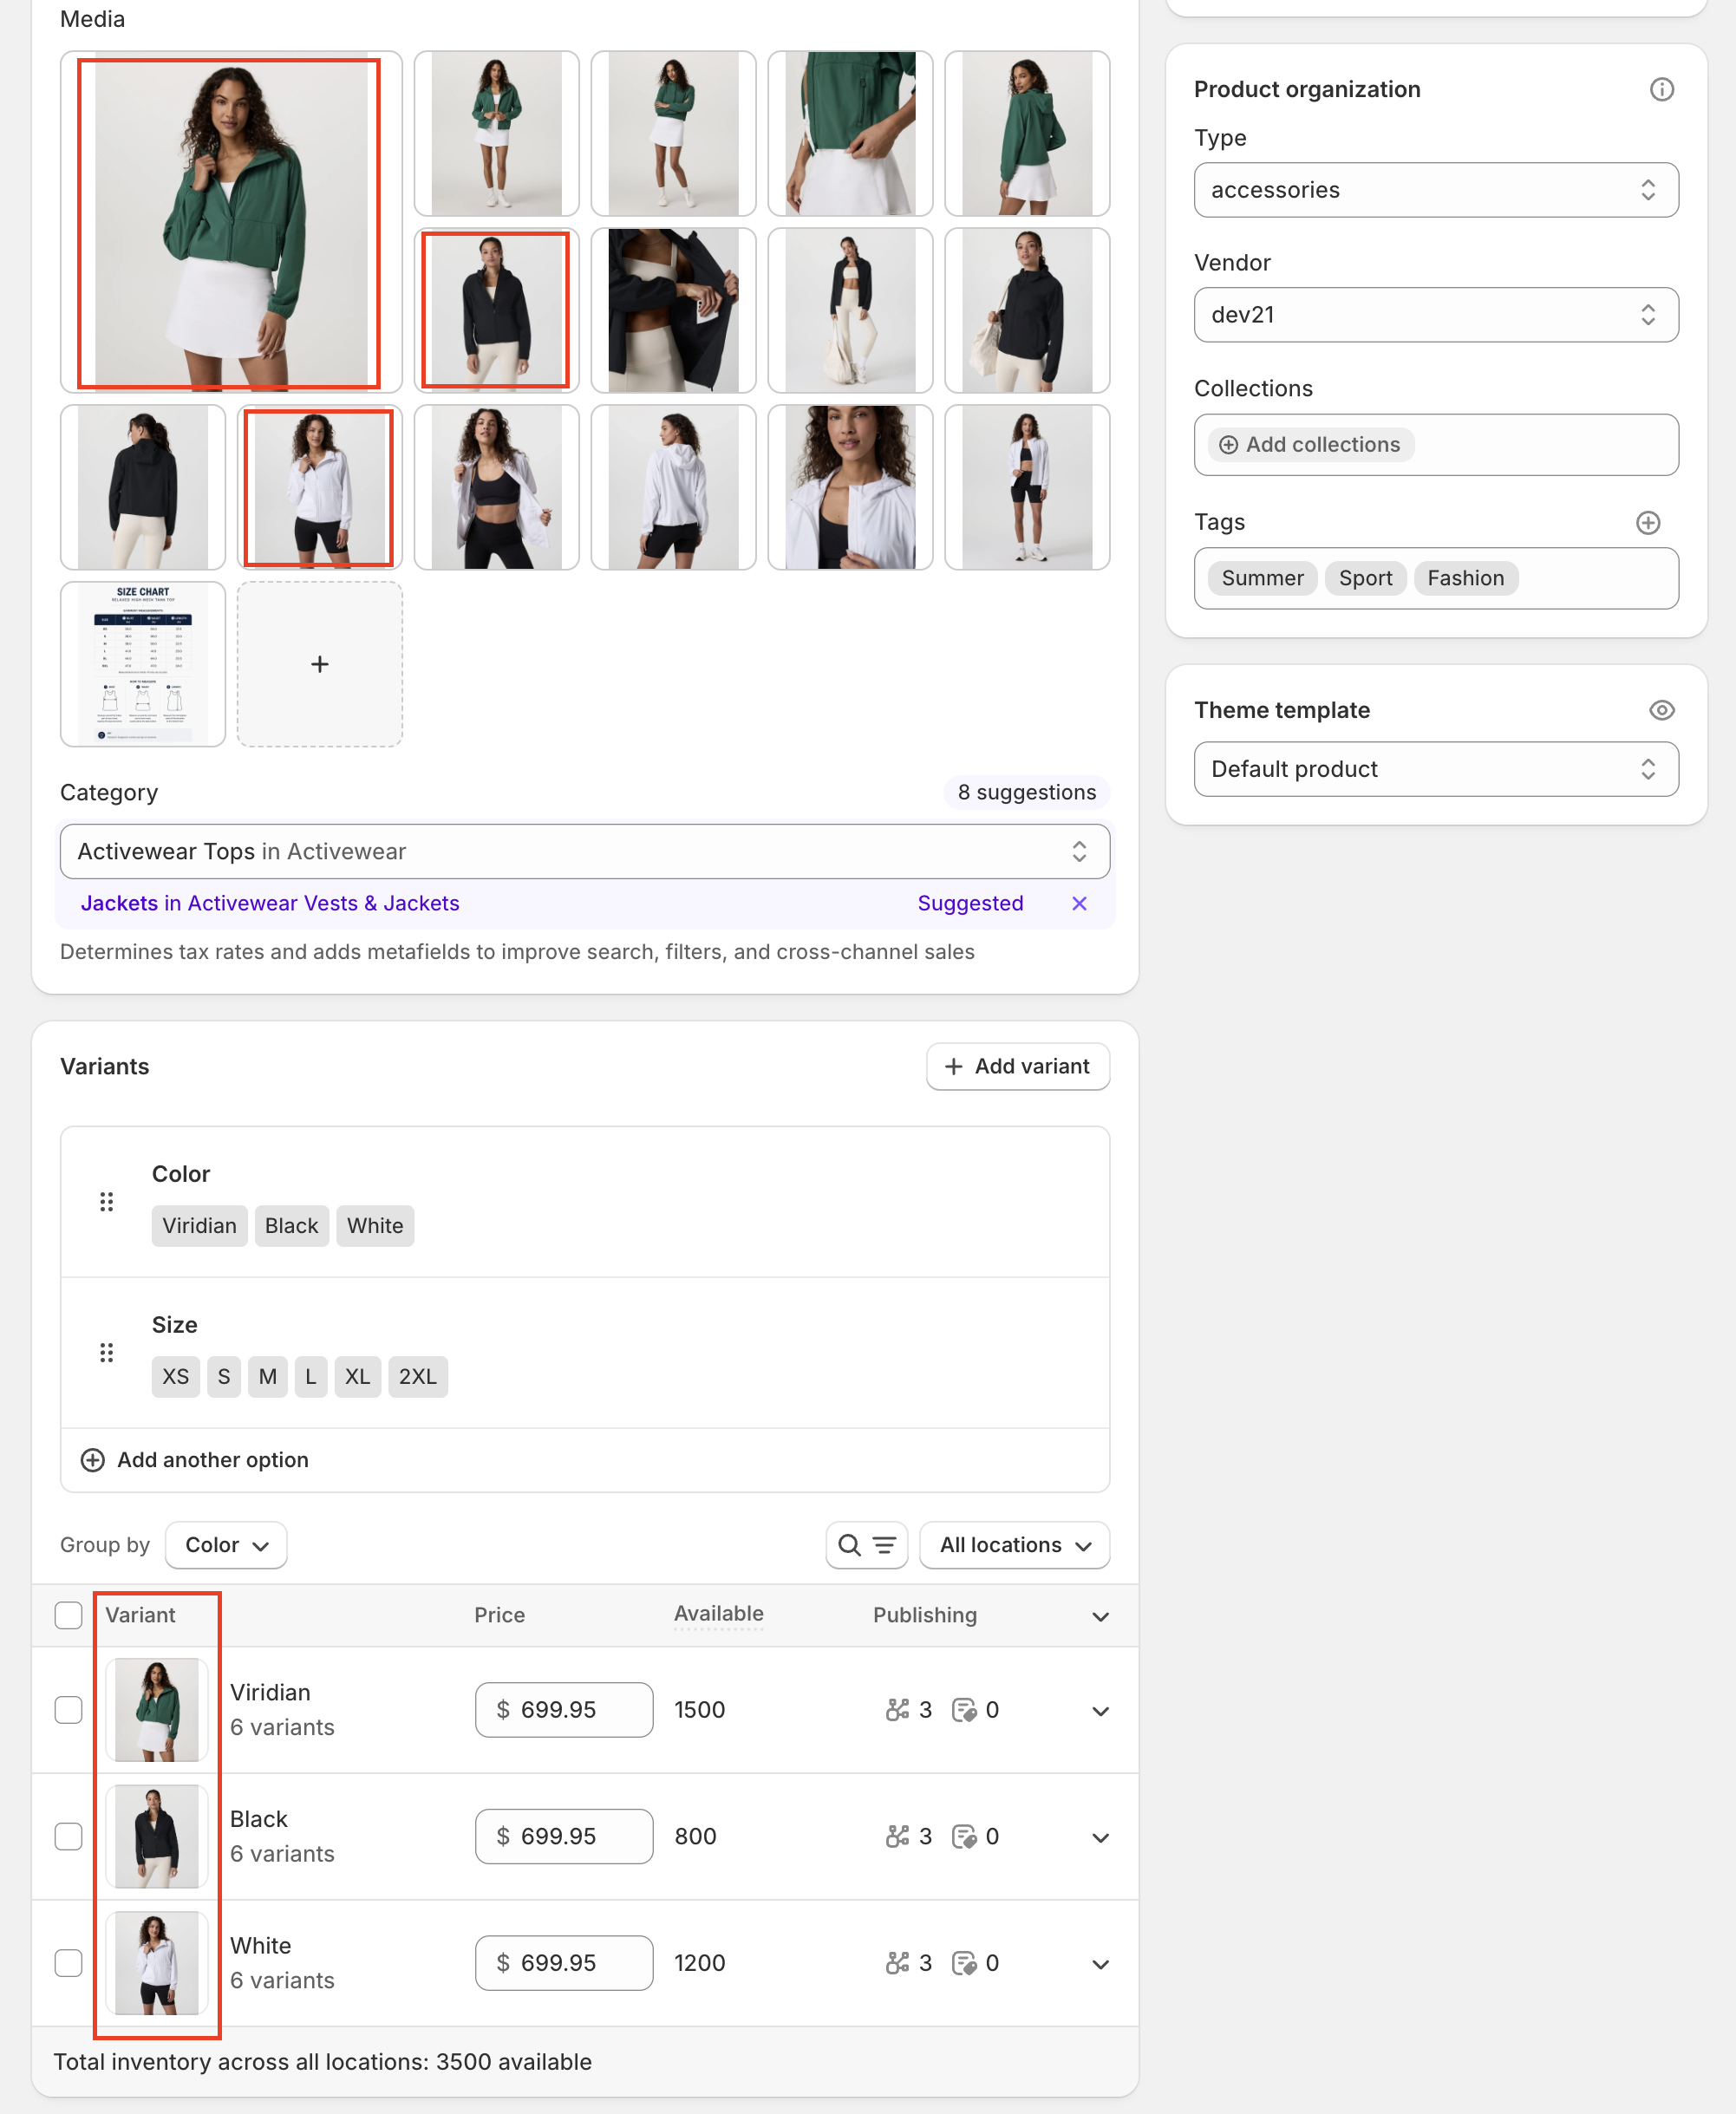
To keep one photo visible for every variant — a size chart, a packaging shot, a scale reference — add [swatchfy:all-variants] to that photo's alt text in Shopify. It then stays visible wherever it sits in the gallery.
It groups by one option only — the first option on the product that has more than one value. If Size comes before Color in your option order and both vary, it groups by Size. Reorder the options in Shopify, or assign that product by hand.
Every variant needs a main image in Shopify. If no variant has one, there is nothing to read and nothing is grouped.
Interleaved photos are refused, not guessed. If your gallery goes black, white, black again, Swatchfy sees the colour reopen and declines to derive anything for that product. That is deliberate: a wrong grouping silently rearranges what shoppers see, which is worse than no grouping. Tidy the media order, or assign that product by hand.
The app embed must be on: Online Store → Themes → Customize → App embeds → Swatchfy Variant Images, then Save.
Variant images status must be on, in Swatchfy → Settings.
The product needs more than one variant.
Open Product setup and choose a product, or use Assign images from the dashboard table.
If the product has more than one option, pick the option you are assigning by, using the tabs at the top. Colour is the usual one.
Drag photos onto each option value. The drop area reads Drag images here to assign.
Drag photos within a value to set the order shoppers see them in.
Save.
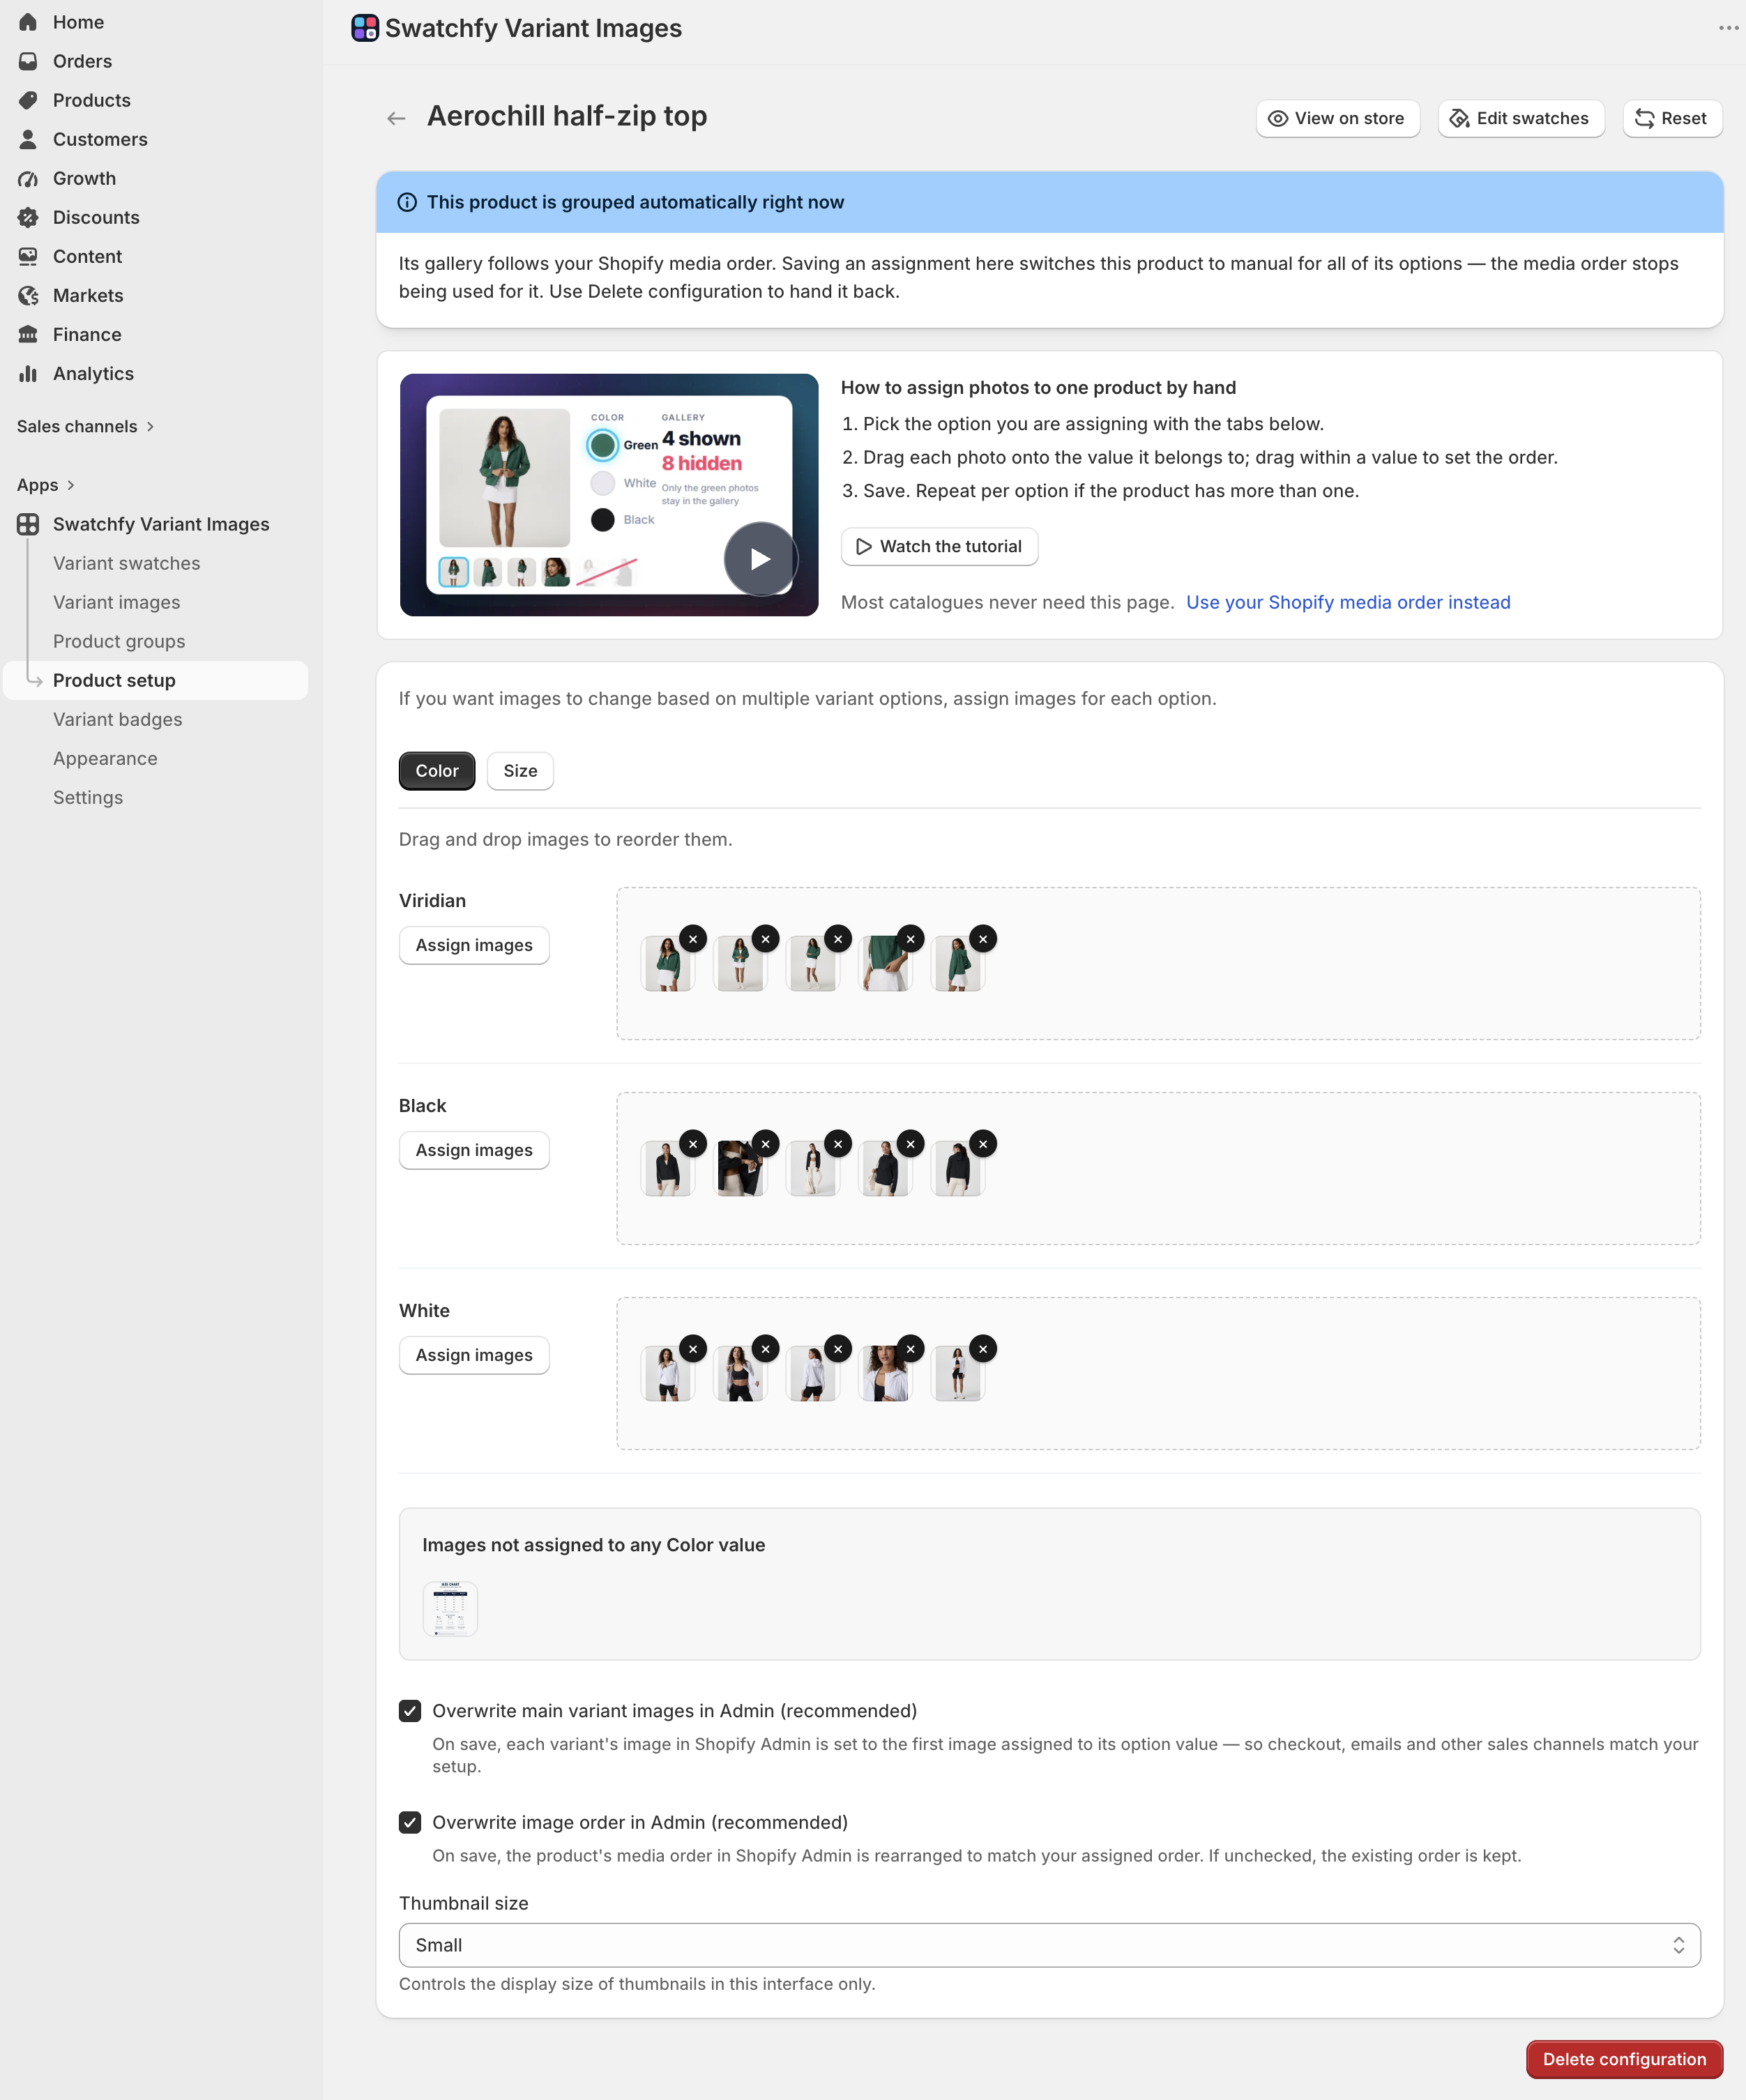
Assign for each option separately, using the tabs. Assigning only Colour means Size will not filter anything — and remember that this product is now on the manual method for both options.
Anything left in Images not assigned to any {option} value stays visible for every variant, unless Hide unassigned images is on. That is how you keep a size chart or a lifestyle shot in the gallery for everyone.
Setting | Where | What it does |
Hide unassigned images | Settings | Hides photos not assigned to any value. On by default. |
Allow the same image for multiple options | Settings | Lets one photo belong to more than one value. |
Overwrite main variant images in Admin | Assign images | On save, sets each variant's main image in Shopify to match your assignment. |
Overwrite image order in Admin | Assign images | On save, reorders the product's media in Shopify to match yours. |
Those last two are worth understanding together with Method 1: they write your Swatchfy assignment back into Shopify's own media order, which is what Method 1 reads. Used deliberately, they are a way to tidy one product by hand and leave it tidy.
Some themes ship their own option for this, named something like Hide other variants' media or Show only variant images, in the product page section settings. Two systems filtering the same gallery will fight. If your gallery behaves oddly, turn the theme's own setting off and let Swatchfy do it.