Swatchfy does two things on your storefront. It shows shoppers only the photos that belong to the variant they selected, and it turns your variant options into colour or image swatches. The dashboard's Setup guide walks you through the same steps as this article, so you can follow either.
Search for Swatchfy Color Swatch Variants on the Shopify App Store, or open the listing directly.
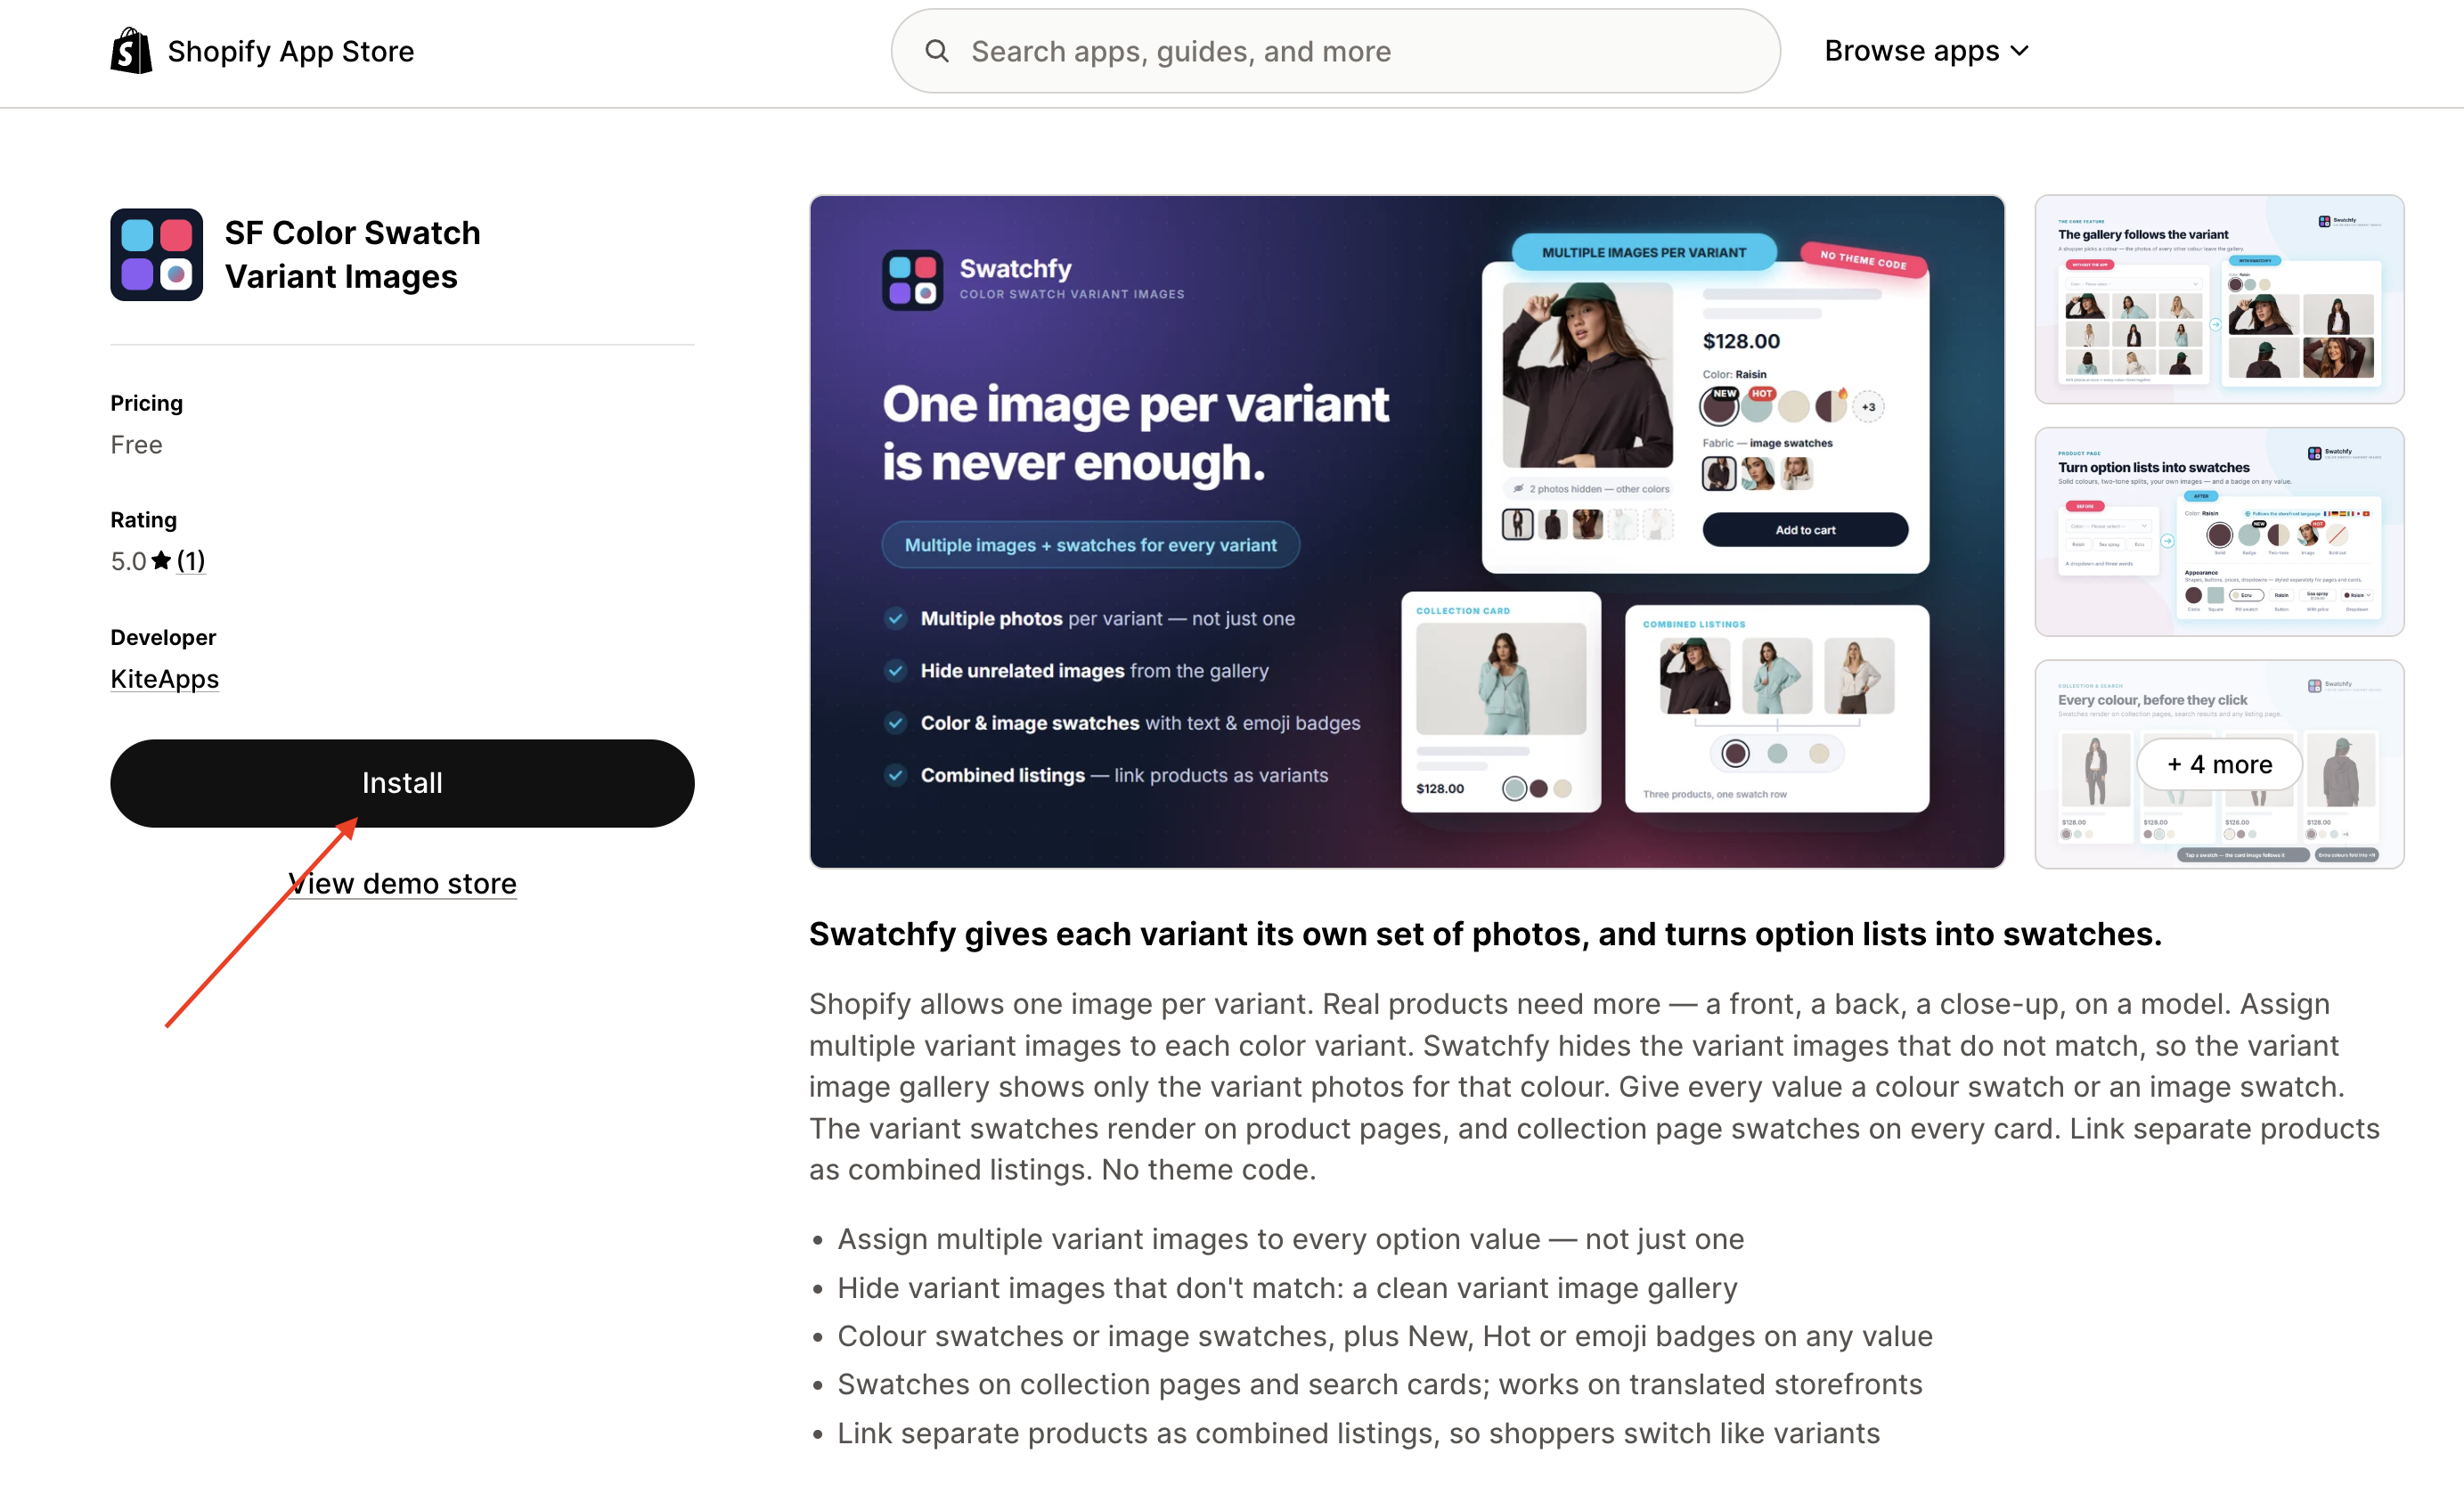
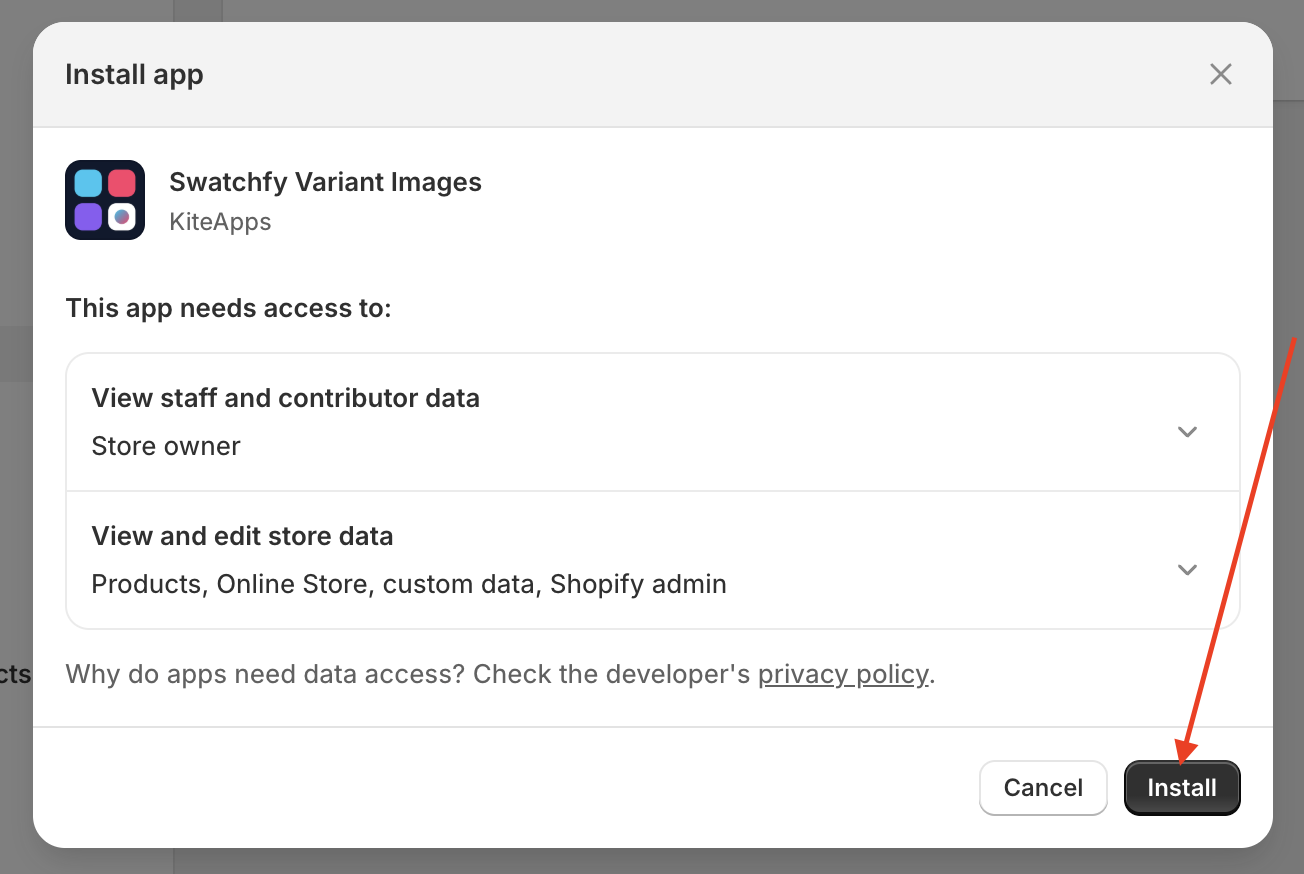
Click Install, then confirm the permissions screen.
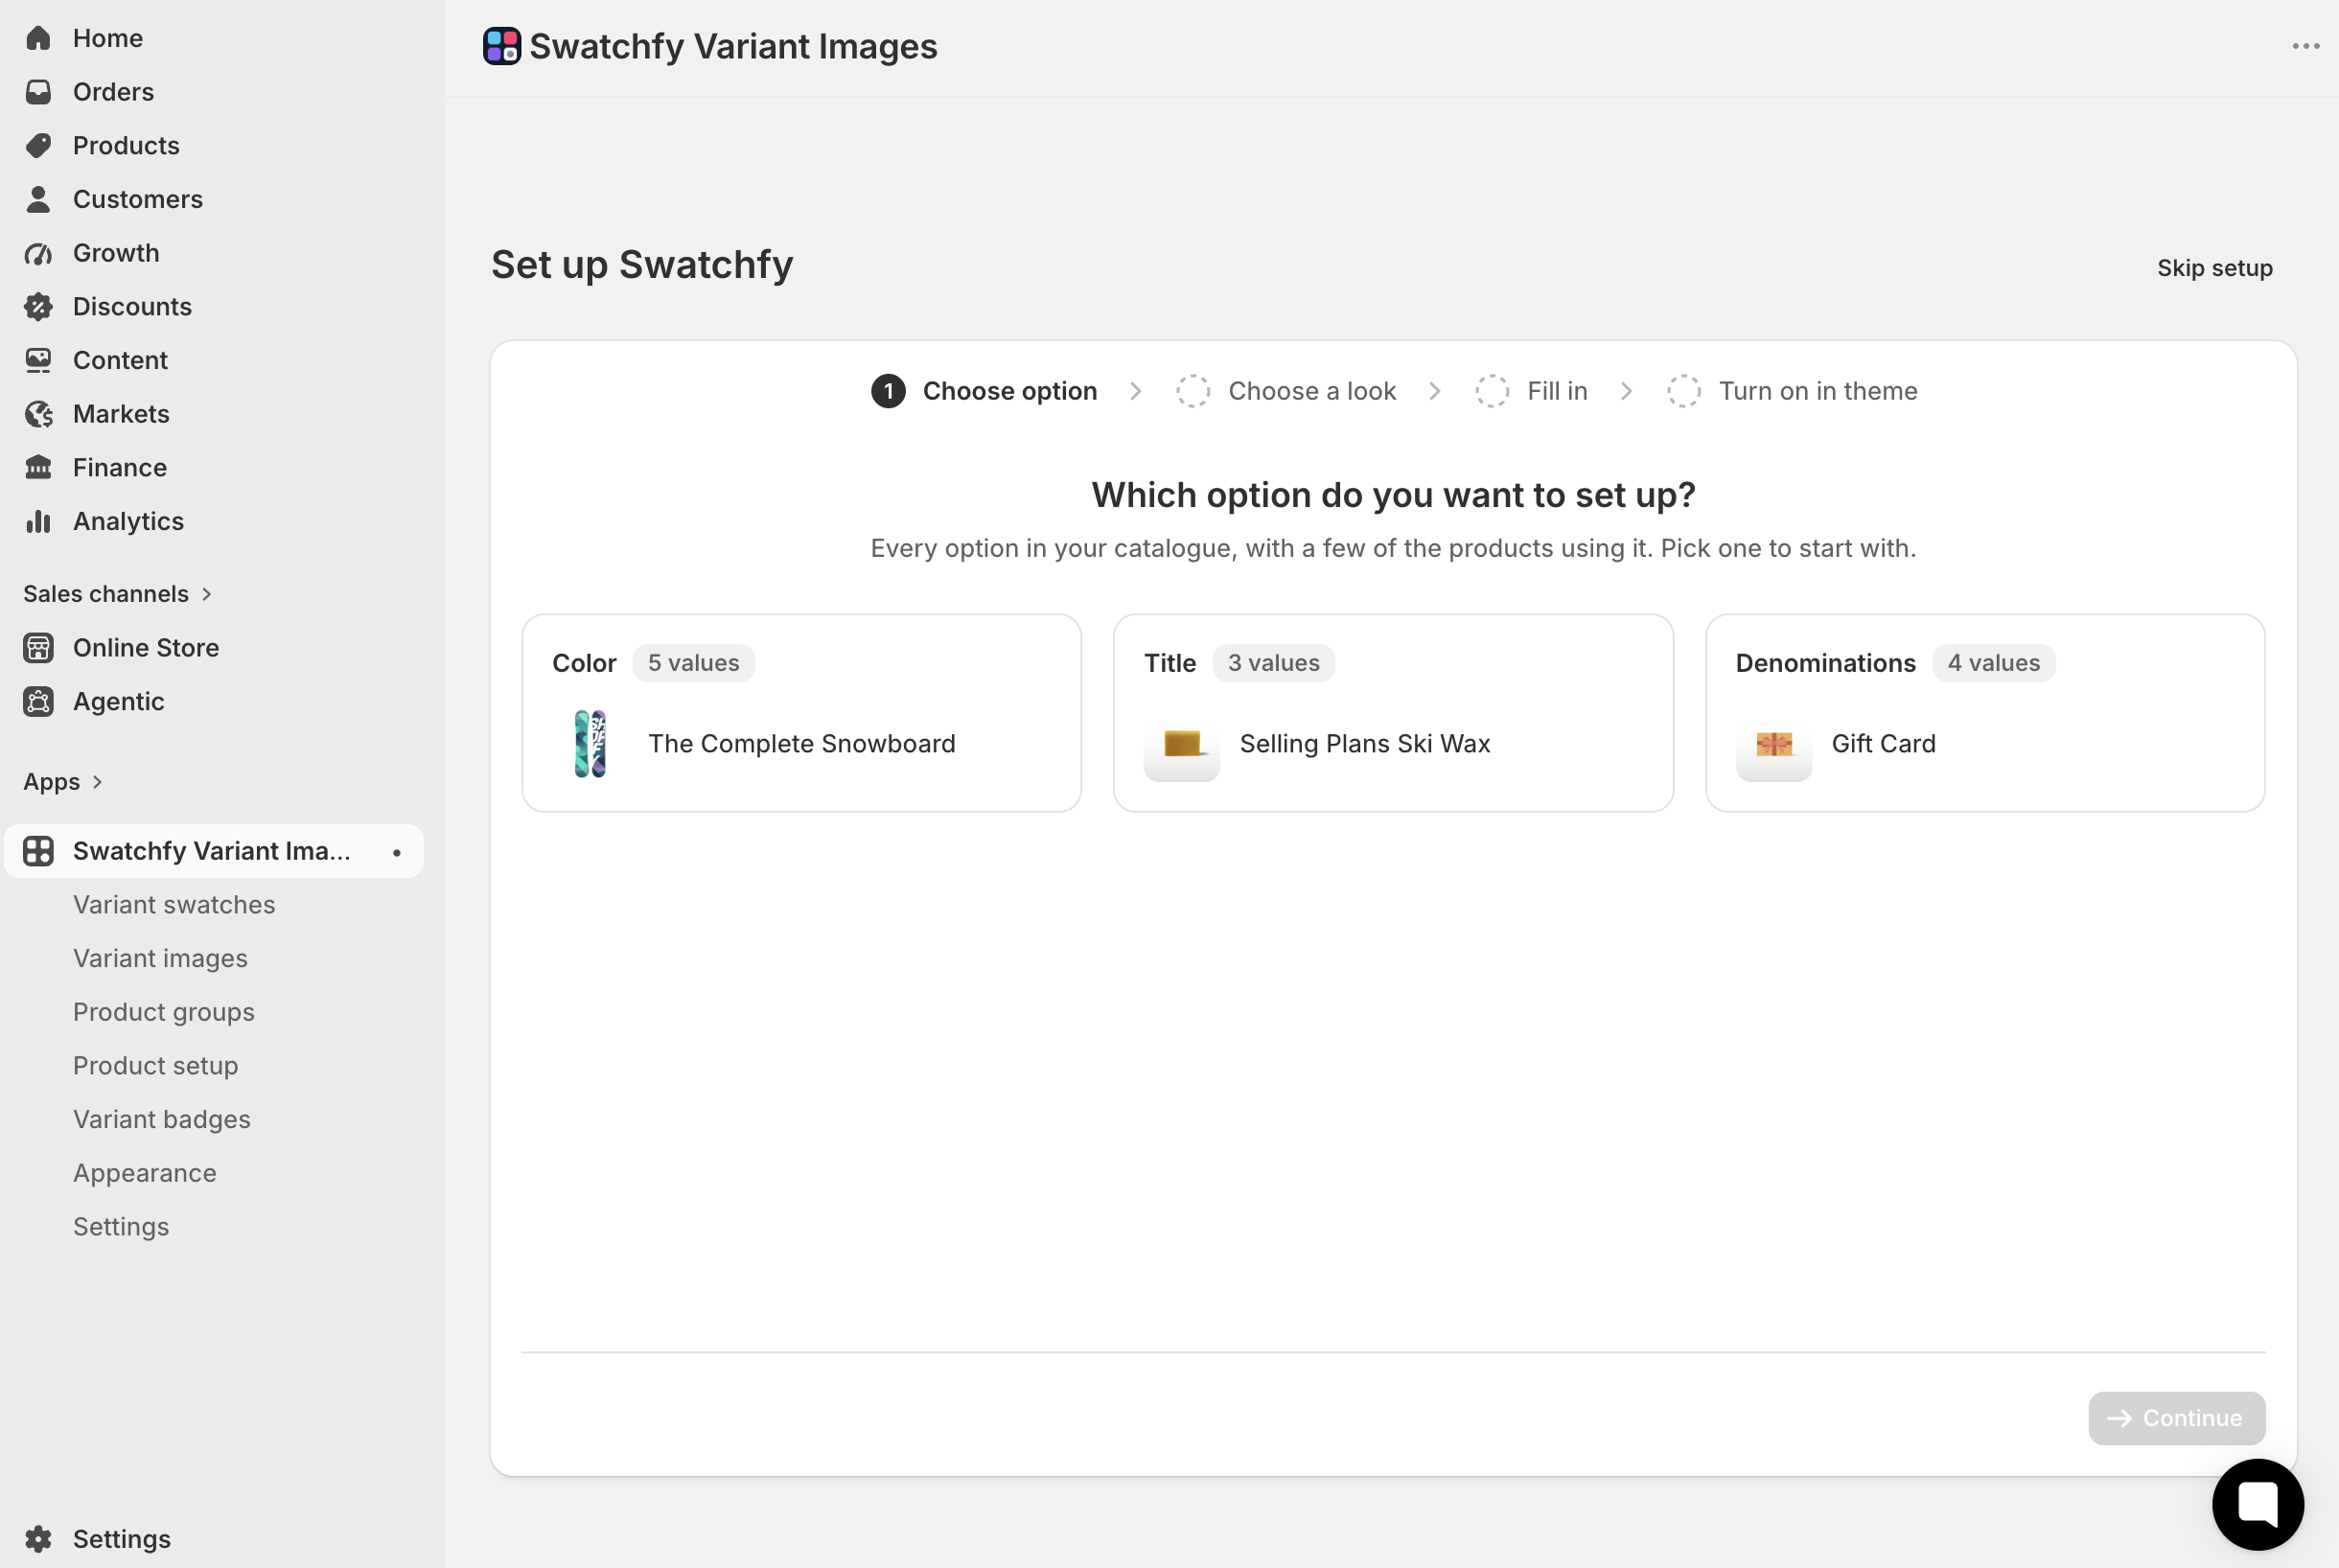
You land on the Swatchfy dashboard. The Setup guide at the top tracks what is left to do, and two status cards, Variant swatches and Variant images, show what is switched on.
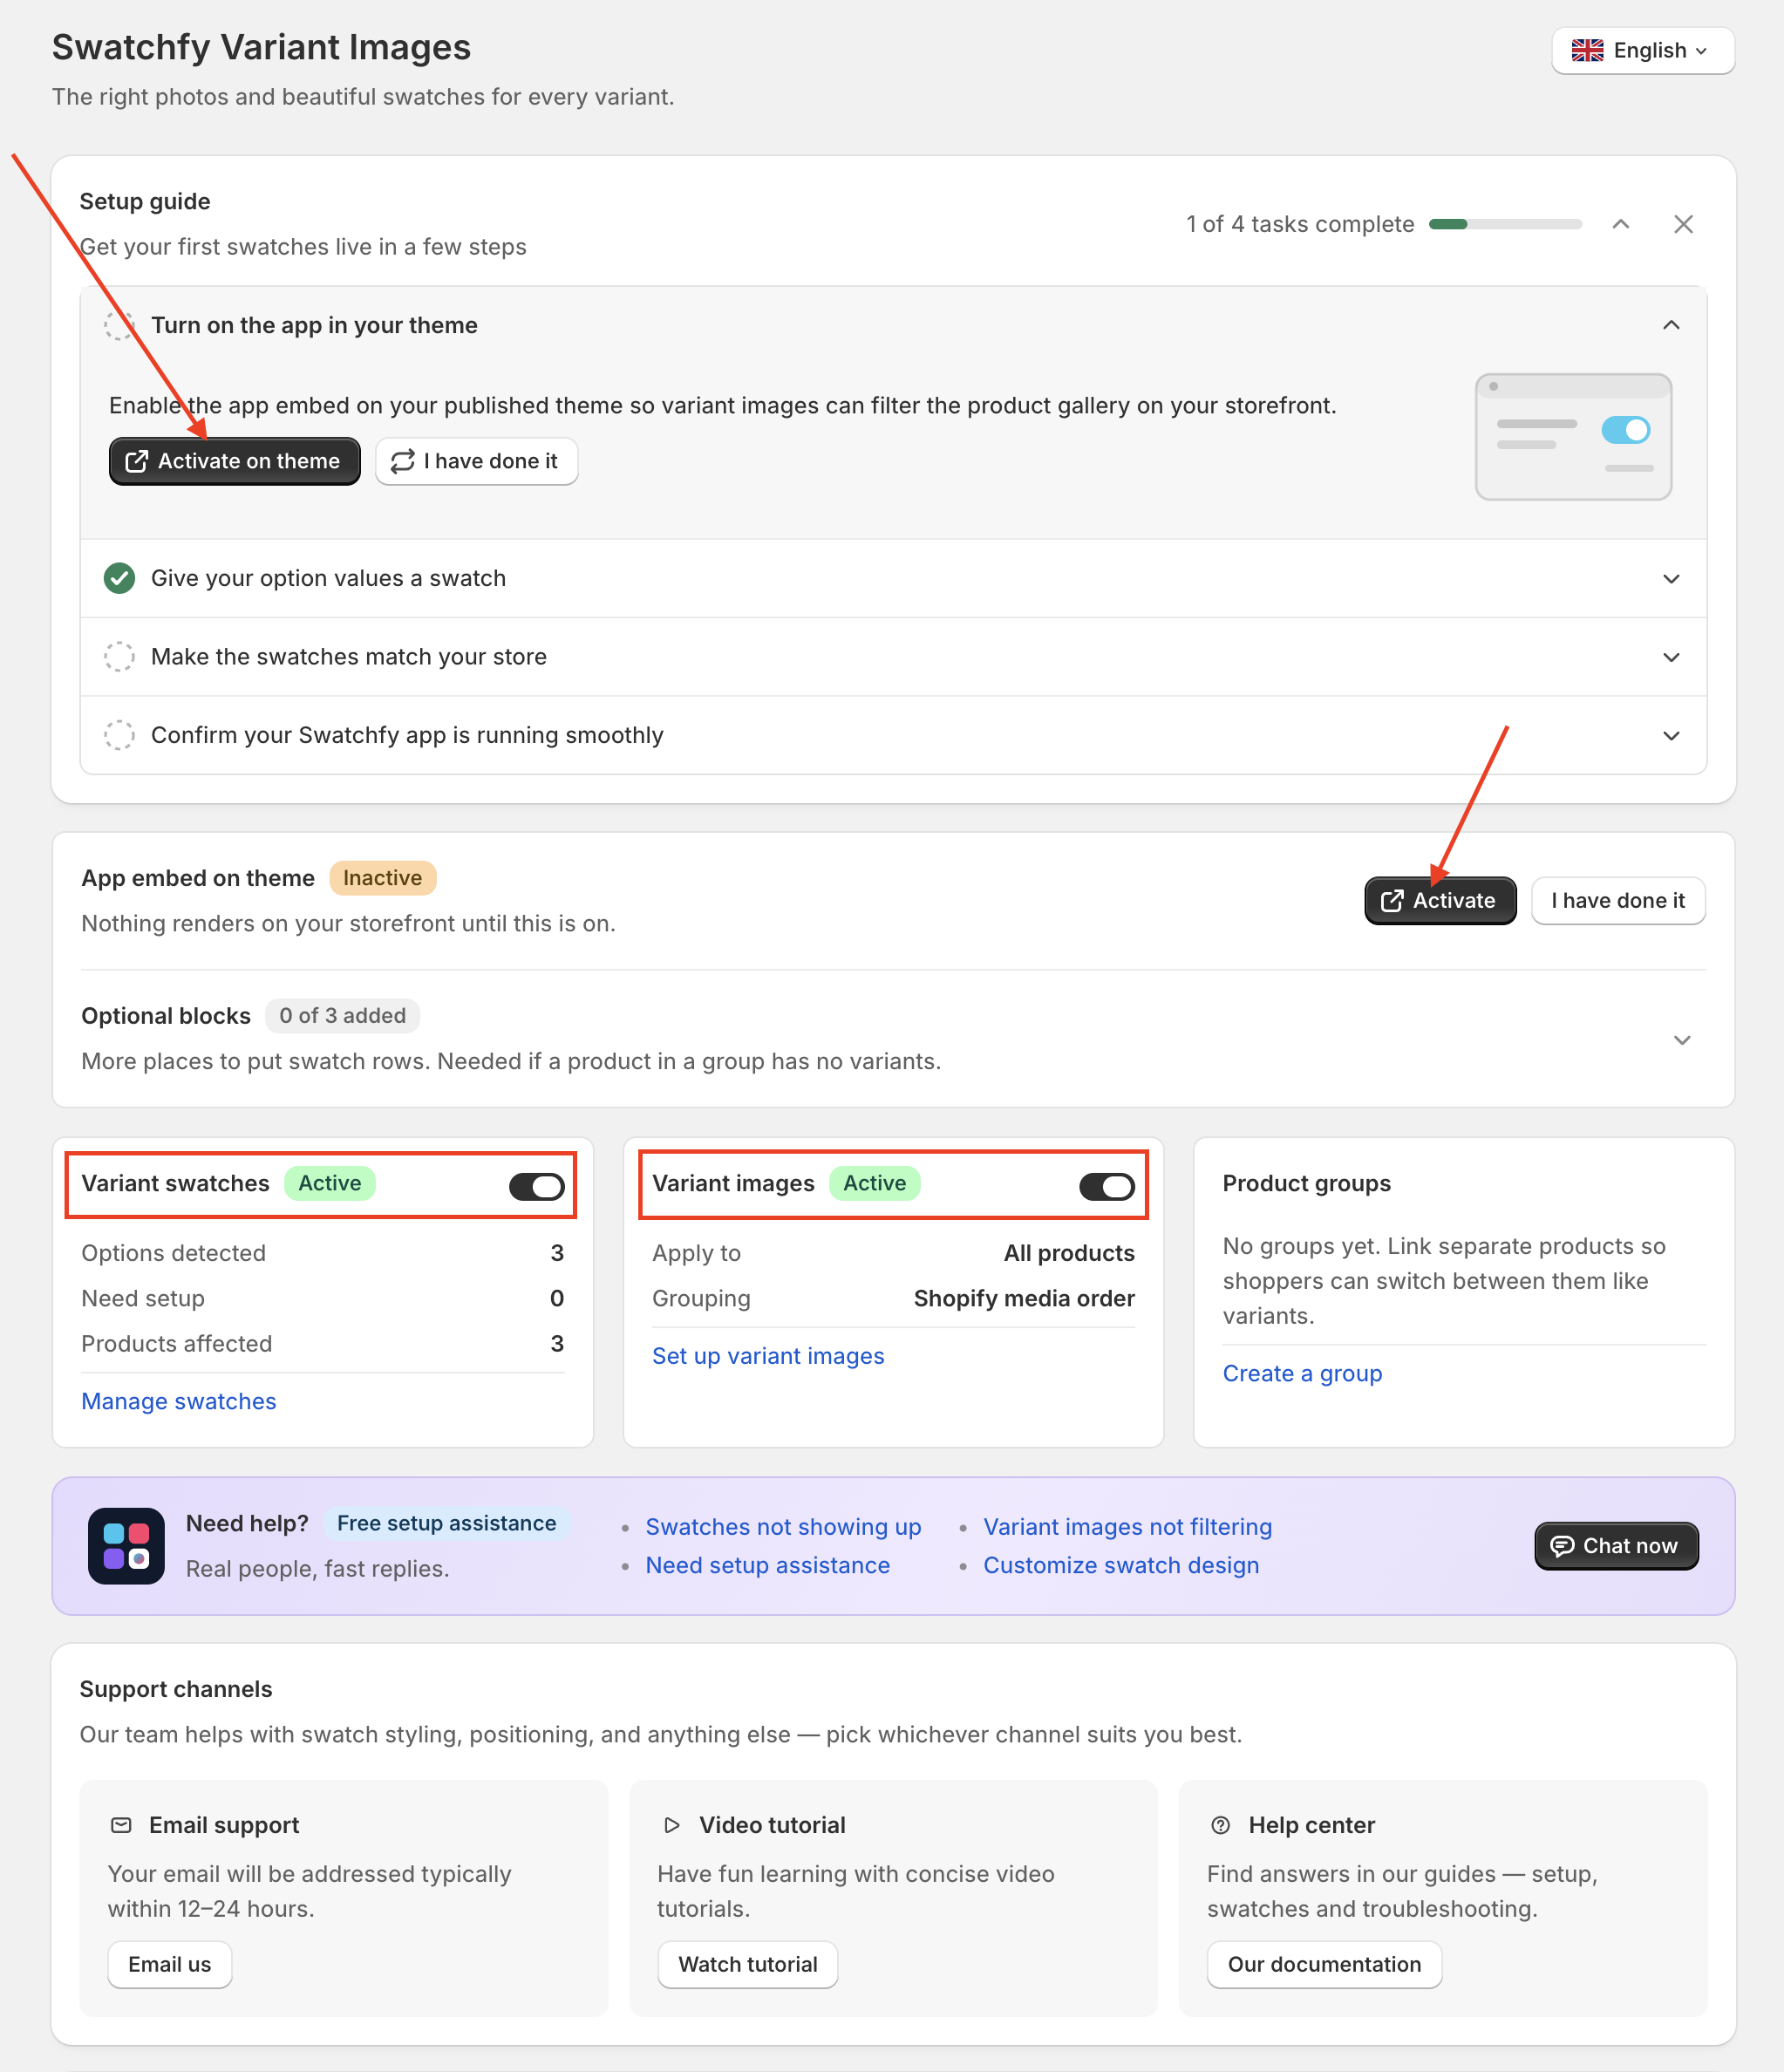
Swatchfy is a theme app extension. Nothing renders on your storefront until its app embed is on.
In the Setup guide, click Activate on theme. This opens your theme editor on the App embeds panel. (You can also get there by hand: Online Store › Themes › Customize › App embeds.)
Turn on Swatchfy Variant Images. There is only one embed, and it powers both variant images and swatches.
Click Save in the theme editor.
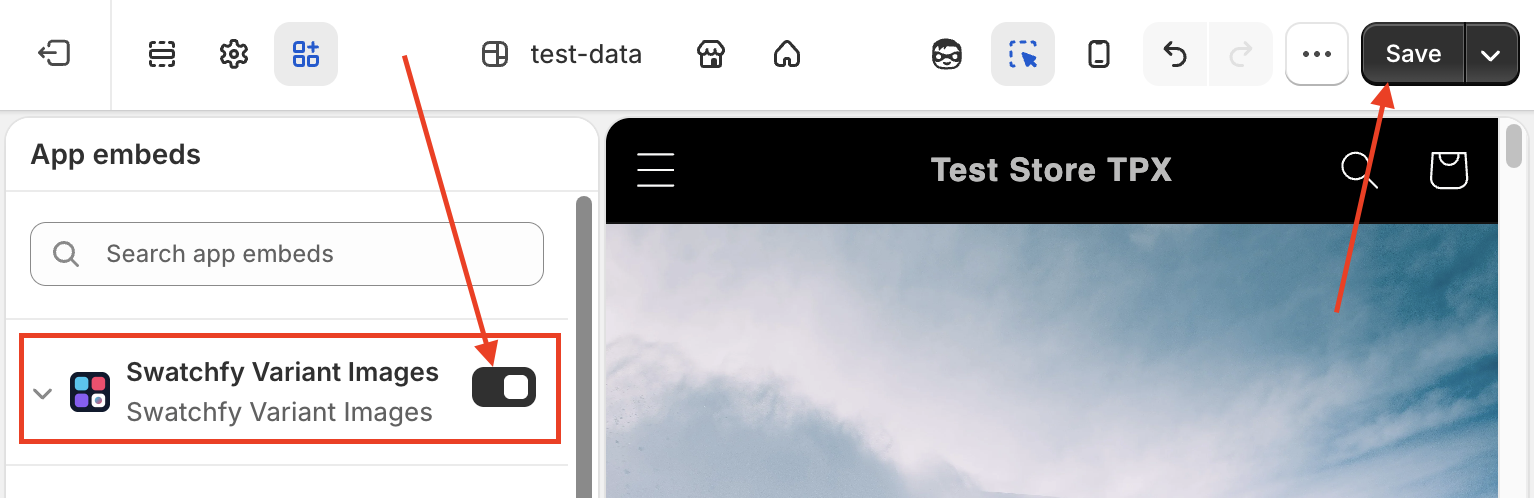
Back in Swatchfy, click I have done it. The guide reads your theme and confirms with App embed detected on your theme.
Two things worth knowing:
Swatches have no separate on/off switch. The app embed is the switch. Which options get a swatch, and where, is decided per option in Step 4.
Variant images do have their own switch, Variant images status on the Variant images page. It is on by default.
On a store where the app has not been granted theme permission, the guide says Still can't read your theme. Reinstall the app to grant it, then check again.
There are two ways to tell Swatchfy which photos belong to which variant. Most stores only need the first.
If each colour's photos already sit together in your Shopify product media, Swatchfy can read the grouping from there and you never assign anything.
Open the Variant images page. Make sure Variant images status is Active.
Make sure Use your Shopify variant images is on. It is on by default.
In Shopify, put each colour's photos together and make each variant's main image the first photo of its group.
Click Check my products. Swatchfy tells you how many of your products with variants are already grouped, for example 8 of 10 products with variants are already grouped in Shopify.
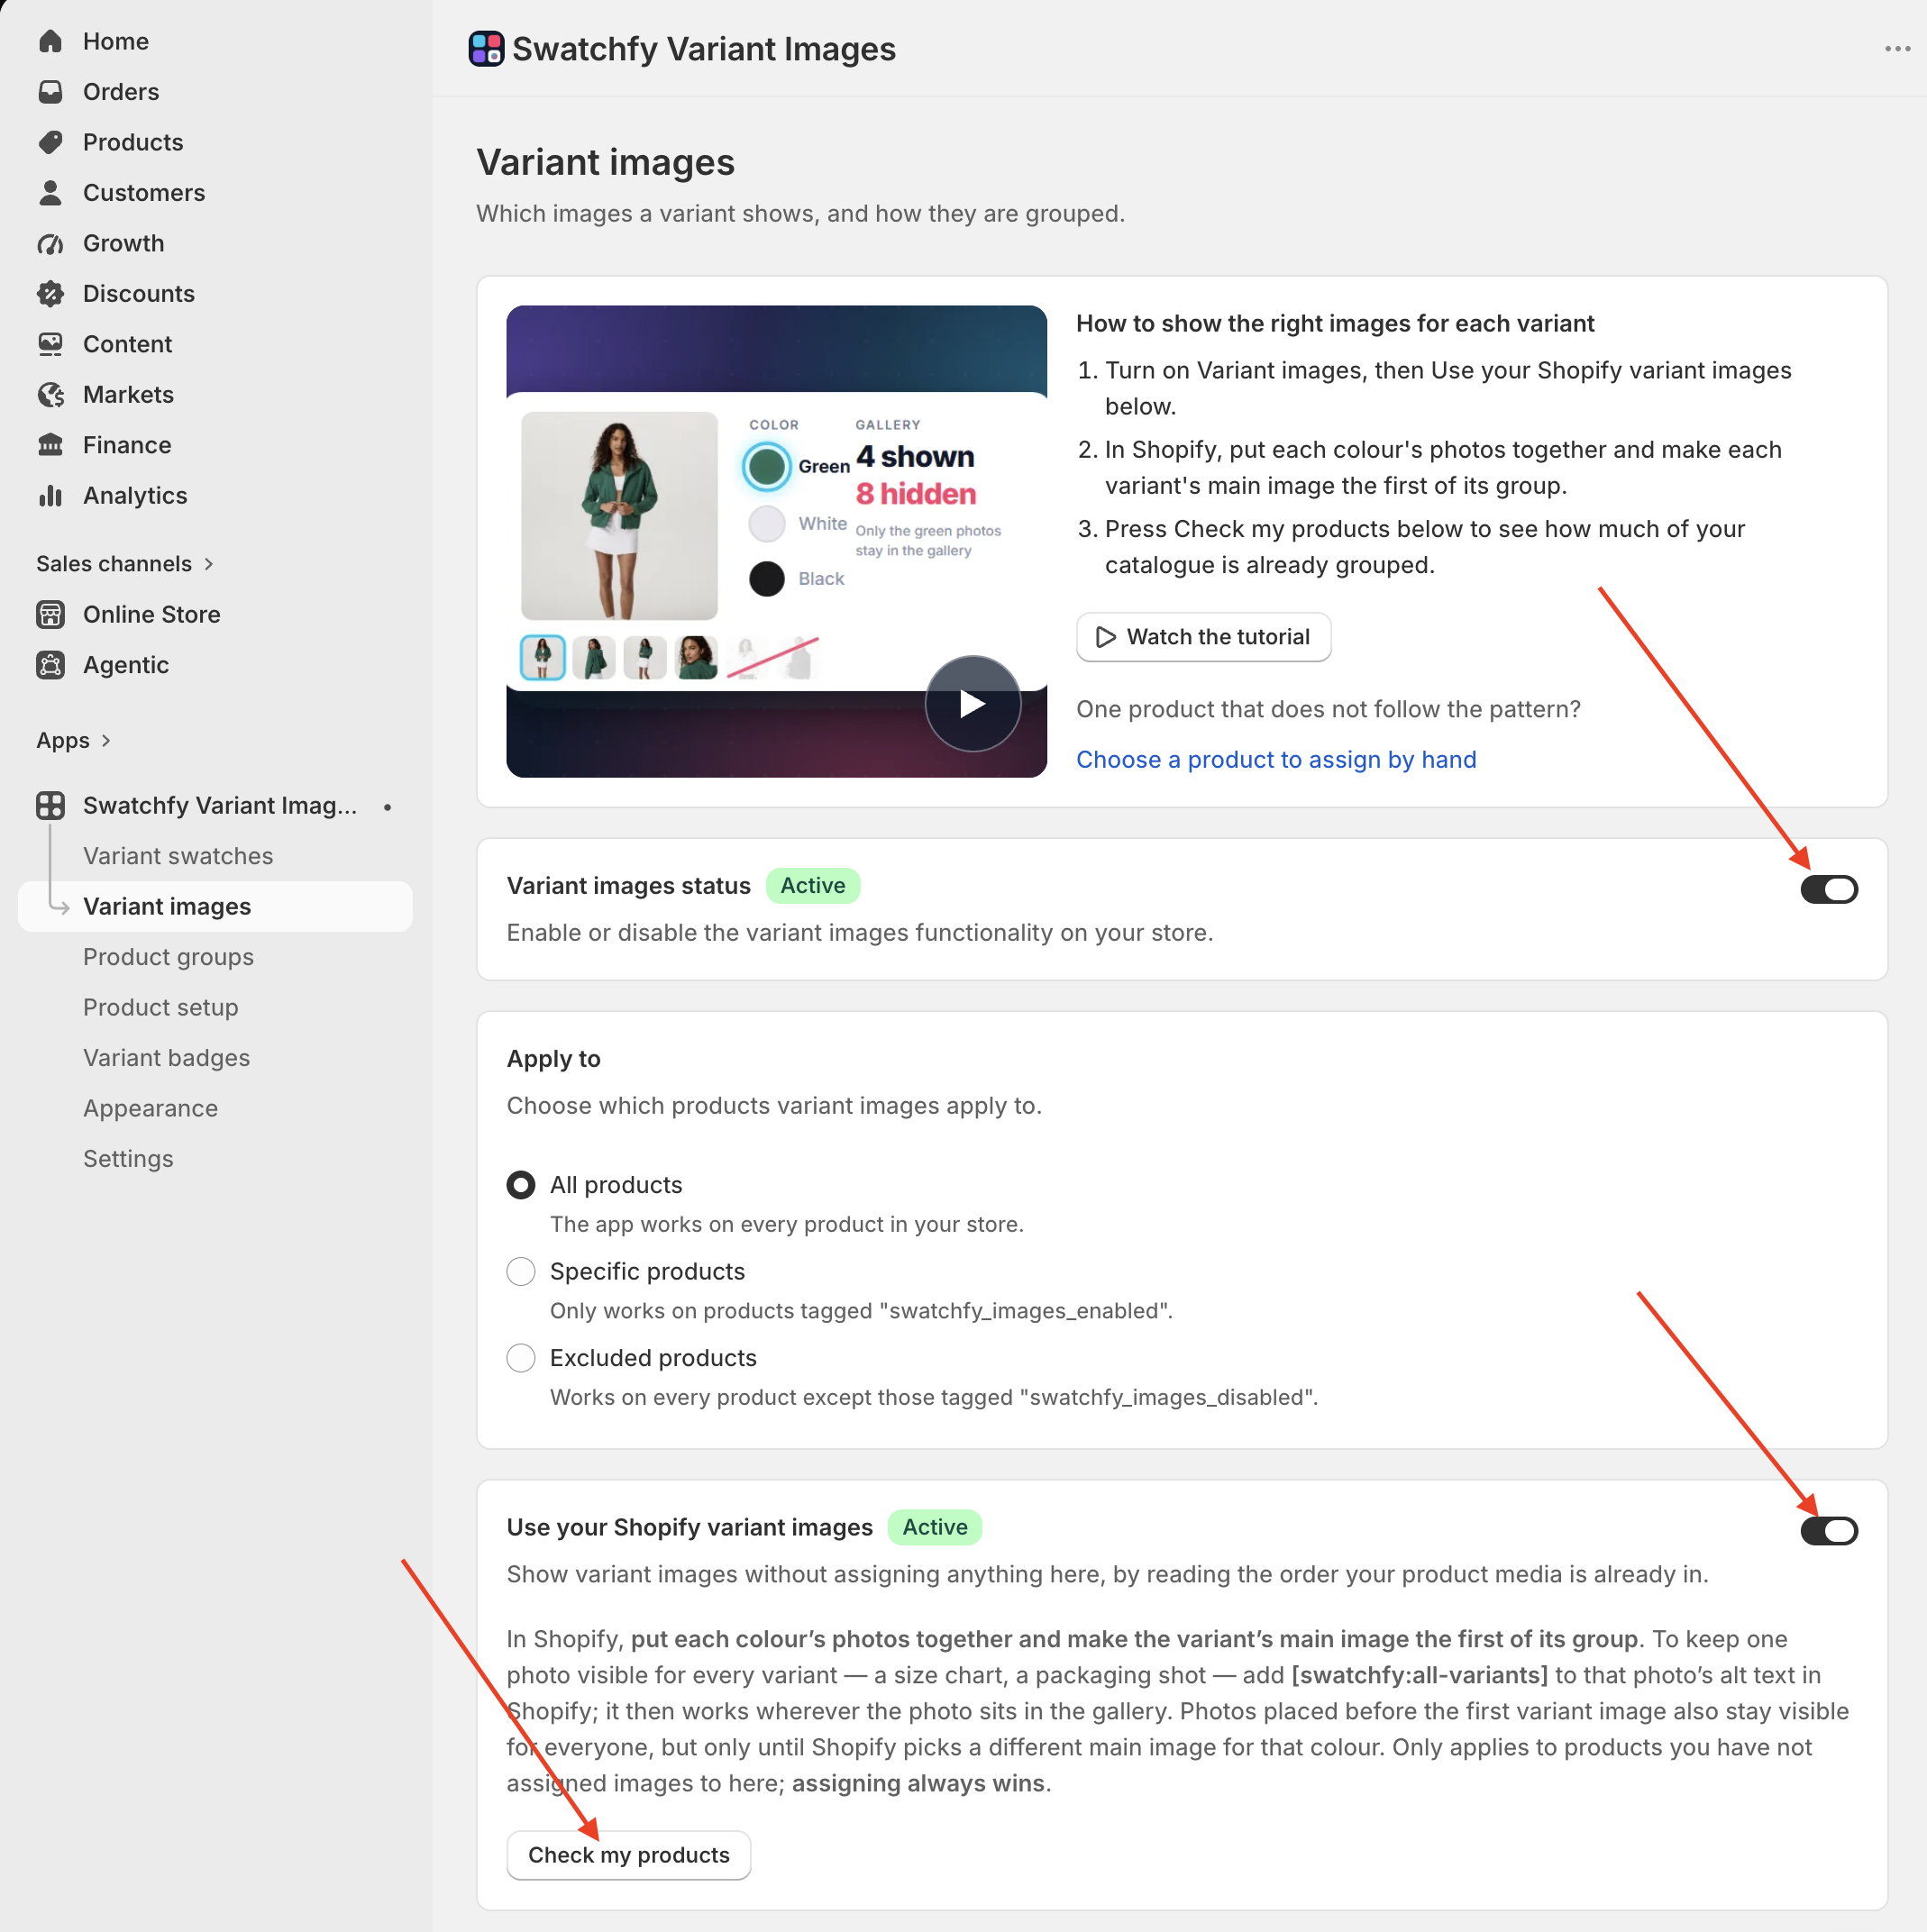
To keep one photo visible for every variant, such as a size chart or a packaging shot, add [swatchfy:all-variants] to that photo's alt text in Shopify. It then stays in the gallery wherever it sits.
Use this for a product that does not follow the pattern, or when images should change based on more than one option.
Open the Product setup page and click + Configure new product, then pick the product.
The page shows one tab per option (for example Color and Size). Pick the option you are assigning.
Each option value (Black, White, Coral…) has its own drop zone. Click Assign images next to a value to pick photos, or drag photos from Images not assigned to any Color value at the bottom. Drag within a zone to set the order.
Repeat for the other tabs if you want images to change based on more than one option.
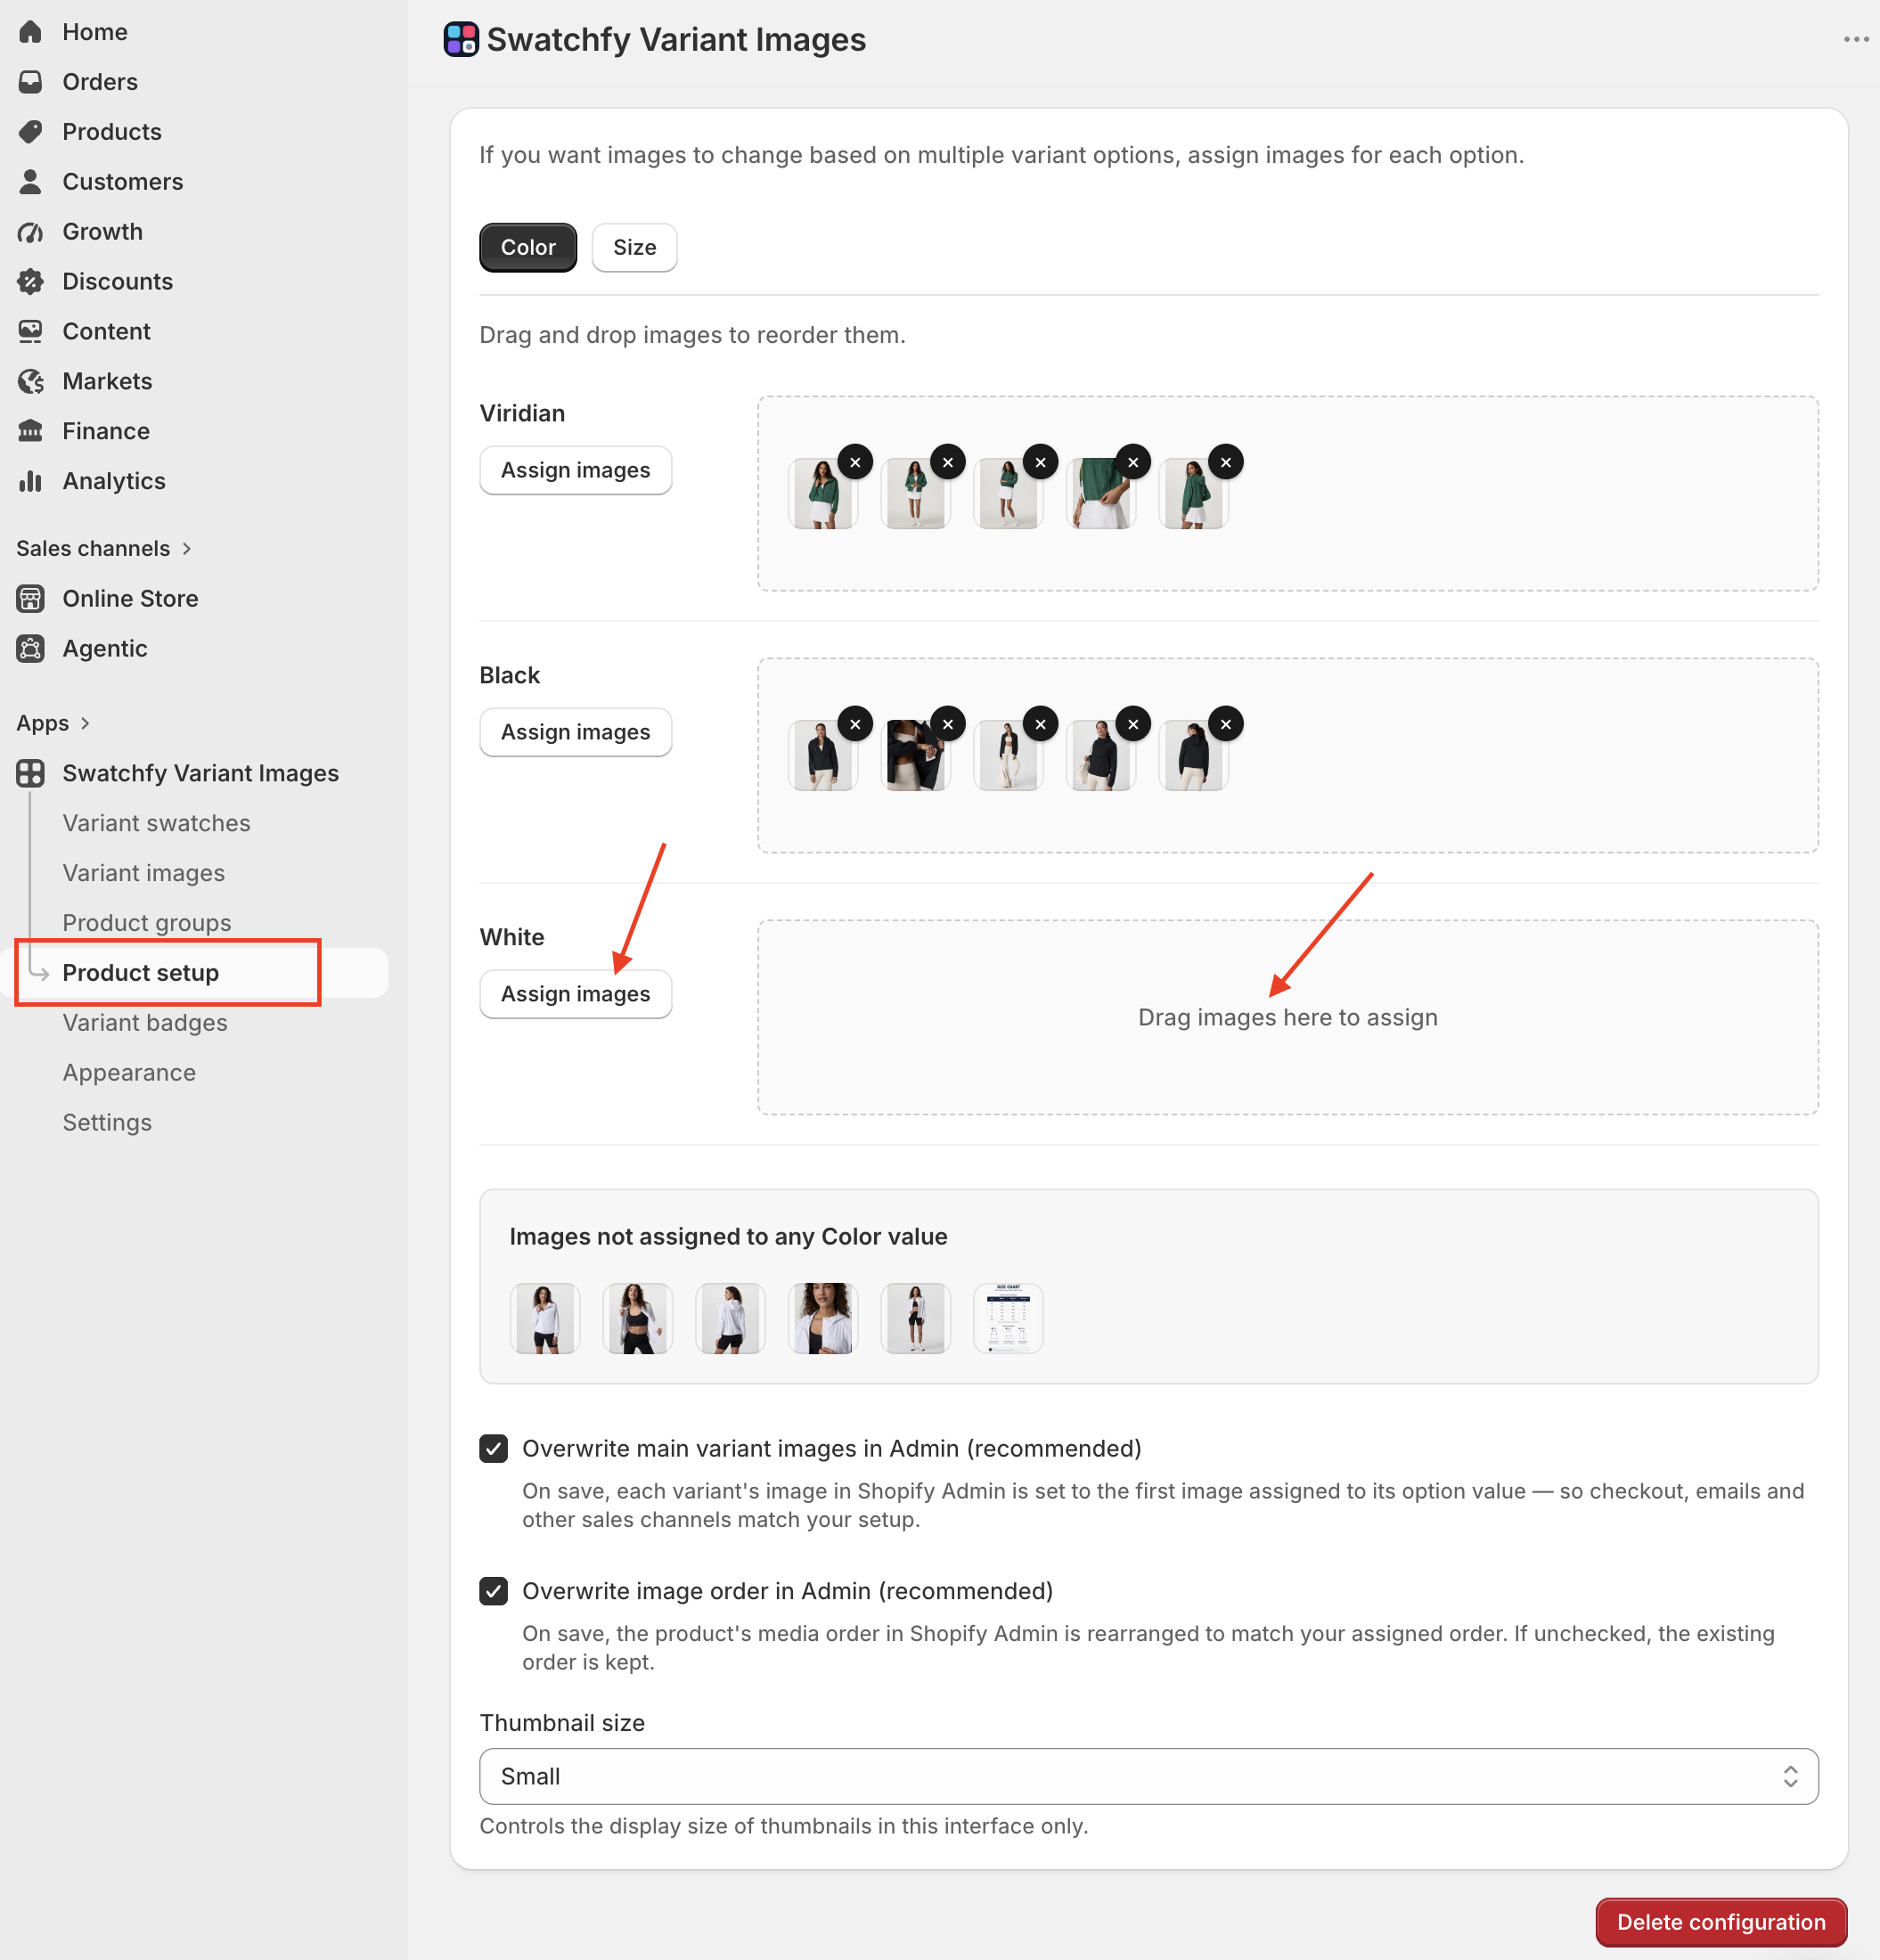
Two options at the bottom are on by default and recommended:
Overwrite main variant images in Admin sets each variant's image in Shopify to the first photo of its value, so checkout, emails and other sales channels match.
Overwrite image order in Admin rearranges the product's media in Shopify to match your assigned order.
Click Save.
Assigning by hand wins for that product: once you save, the media order from Method A is no longer used for it, for any of its options. The page tells you this before you save.
Buttons on this page:
View on store opens the product page so you can check the result.
Edit swatches jumps to this product's swatch overrides (see Step 4).
Reset clears the assignments for the option you are viewing.
Delete configuration removes all assignments for this product and hands it back to Method A. Your Shopify images are not affected.
Back on Product setup, every configured product has a row with Edit images, Edit swatches, Pause and Delete configuration. Pause keeps the assignments but stops using them on the storefront until you Resume.
Hide unassigned images: when on, photos that are not assigned to any value are hidden from the product gallery. Turn it off if you want unassigned photos to always stay visible.
Allow assigning the same image to multiple options: turn this on when one photo genuinely belongs to more than one option value.
Open the Variant swatches page and click Sync data. Swatchfy reads the option names and values your catalogue uses. Only that list is stored, nothing about the products.
In the Swatches by option table, each option has a Product page display and a Collection page display. They are independent, so an option can show on the product page and stay off collection cards. Choose Do not show to hide it on that surface. Auto picks an image if the value has one, else a colour, else a button.
Variant image swatch uses your existing variant photos and needs no further setup. For colour and image swatches, click Set swatches on the option's row and give each value a colour or an image. Suggest colours fills in colours it can read from the value names, such as Navy or Forest green; review the result, then Save.
The table shows Ready when every value has a swatch and n missing when some still need one.
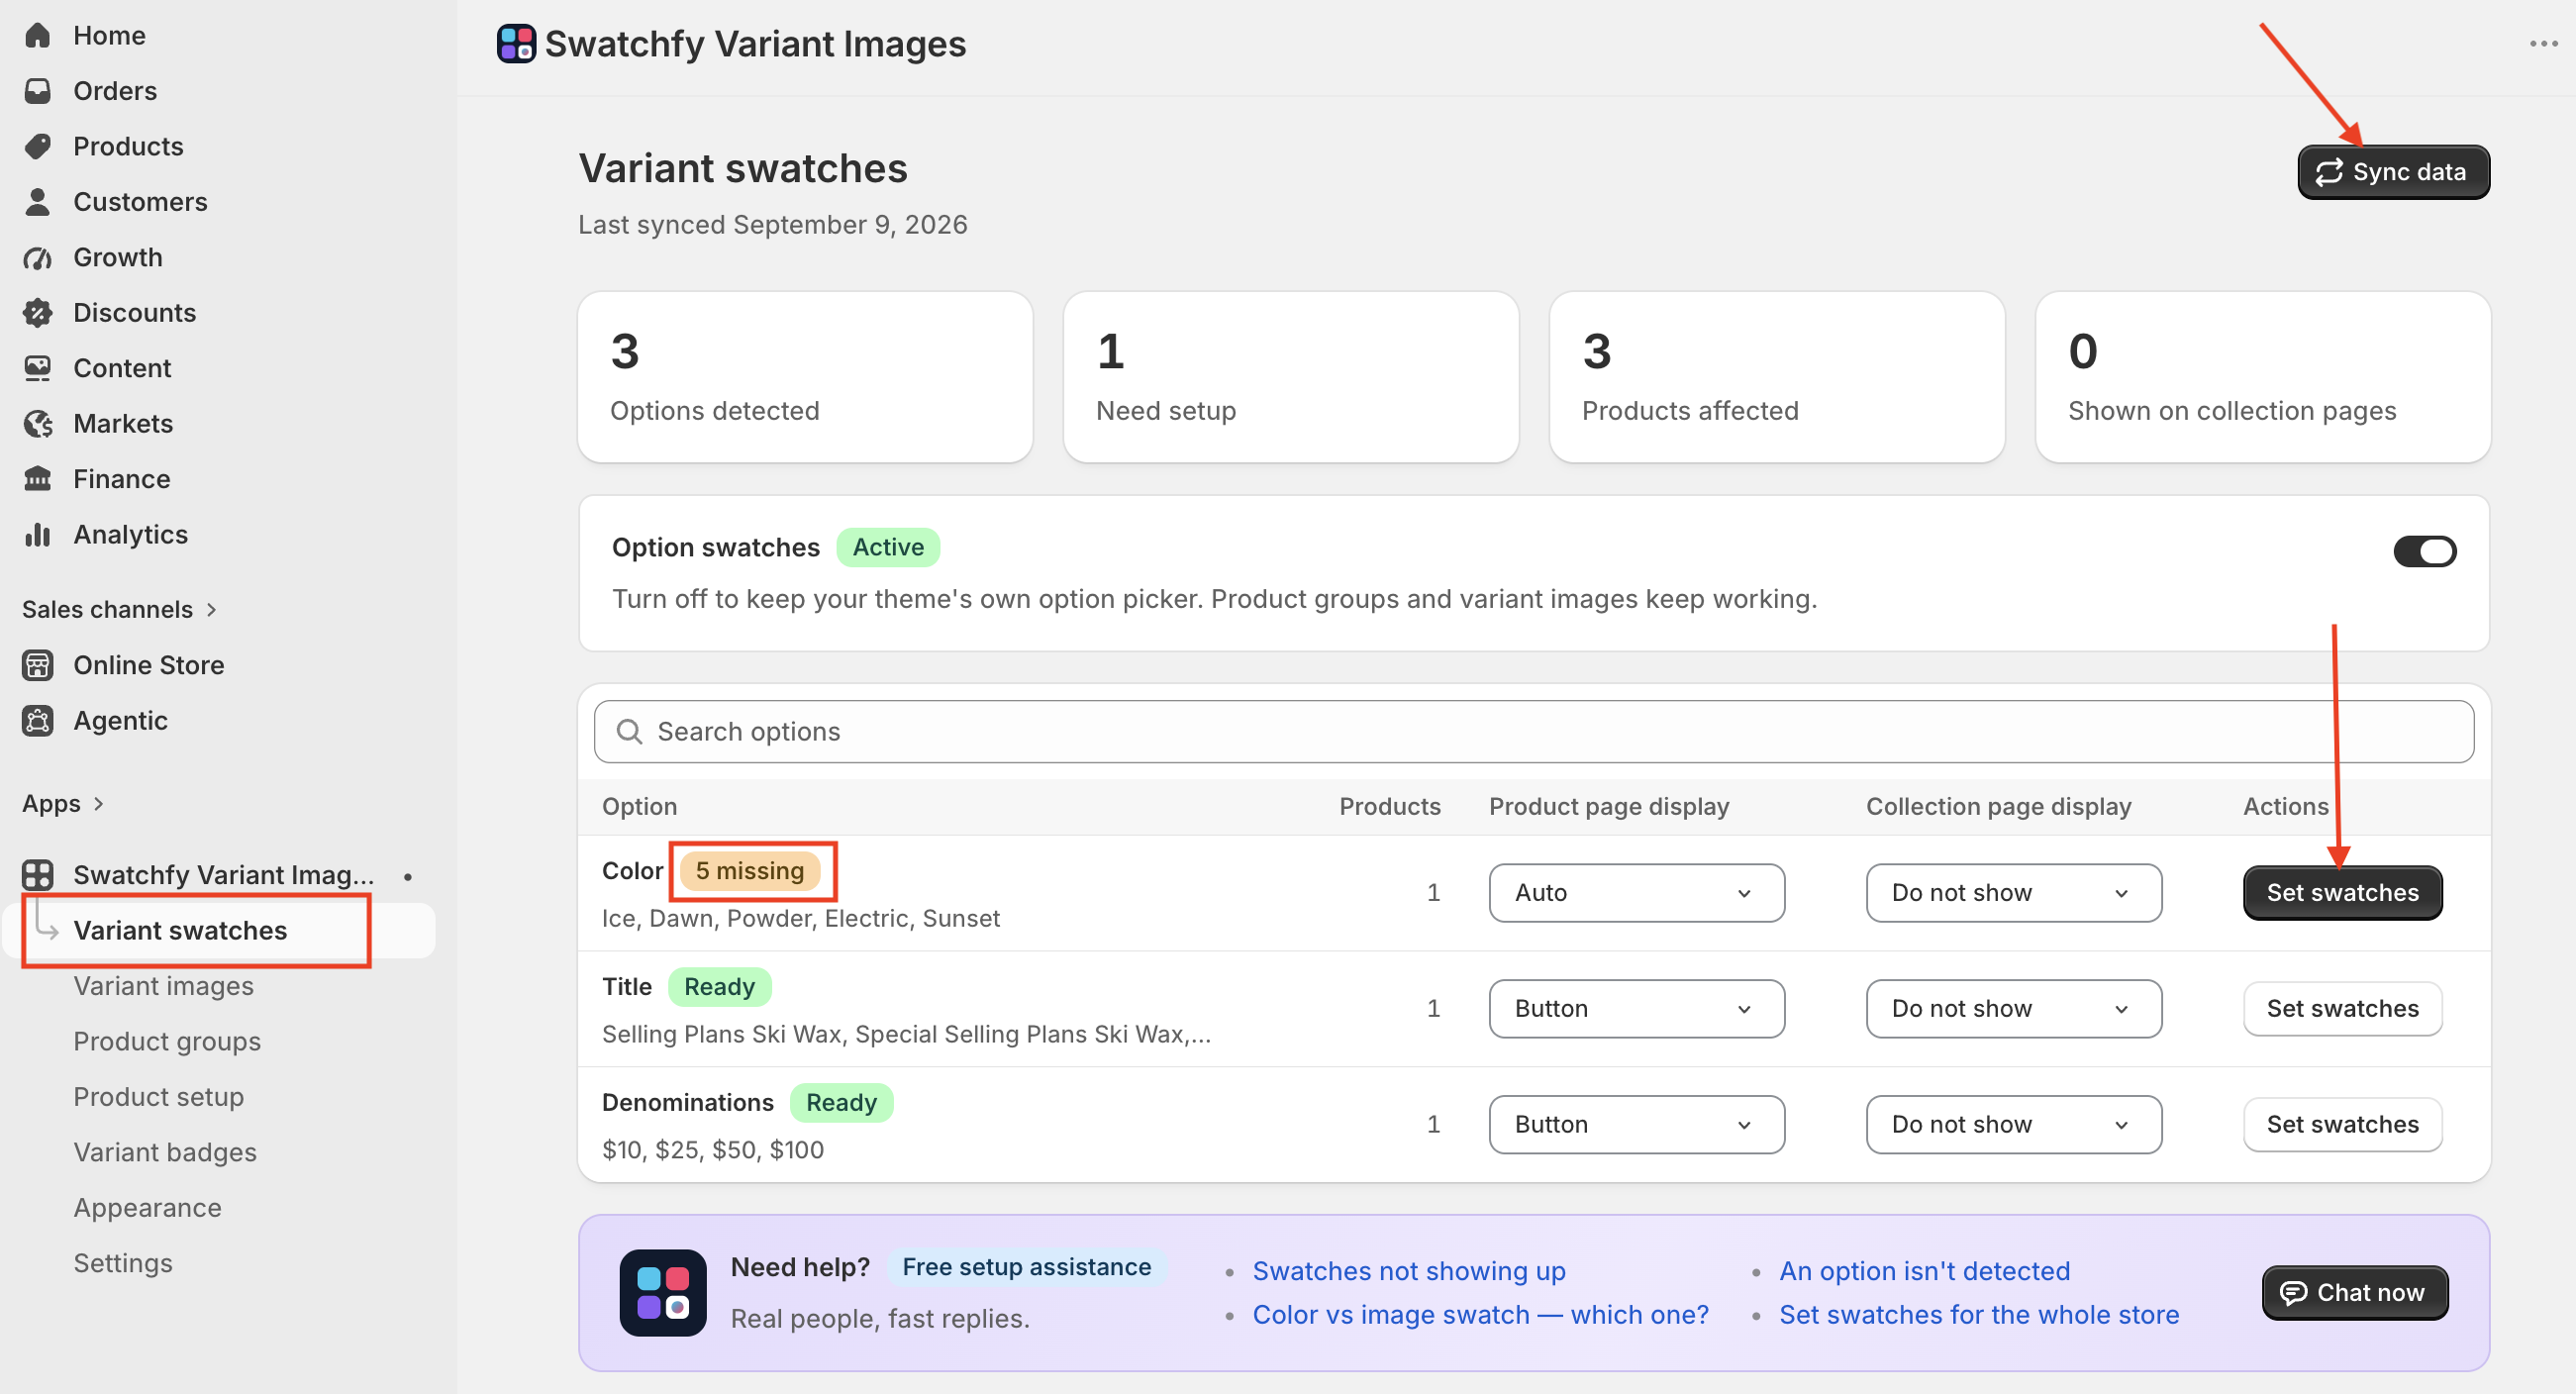
These are store-wide defaults. To override them for a single product, open Product setup › Edit swatches and set a colour or image per value there. Either one is enough; the image wins if you set both.
If you rename an option in Shopify, click Sync data again. Until you do, its page reads Option not found.
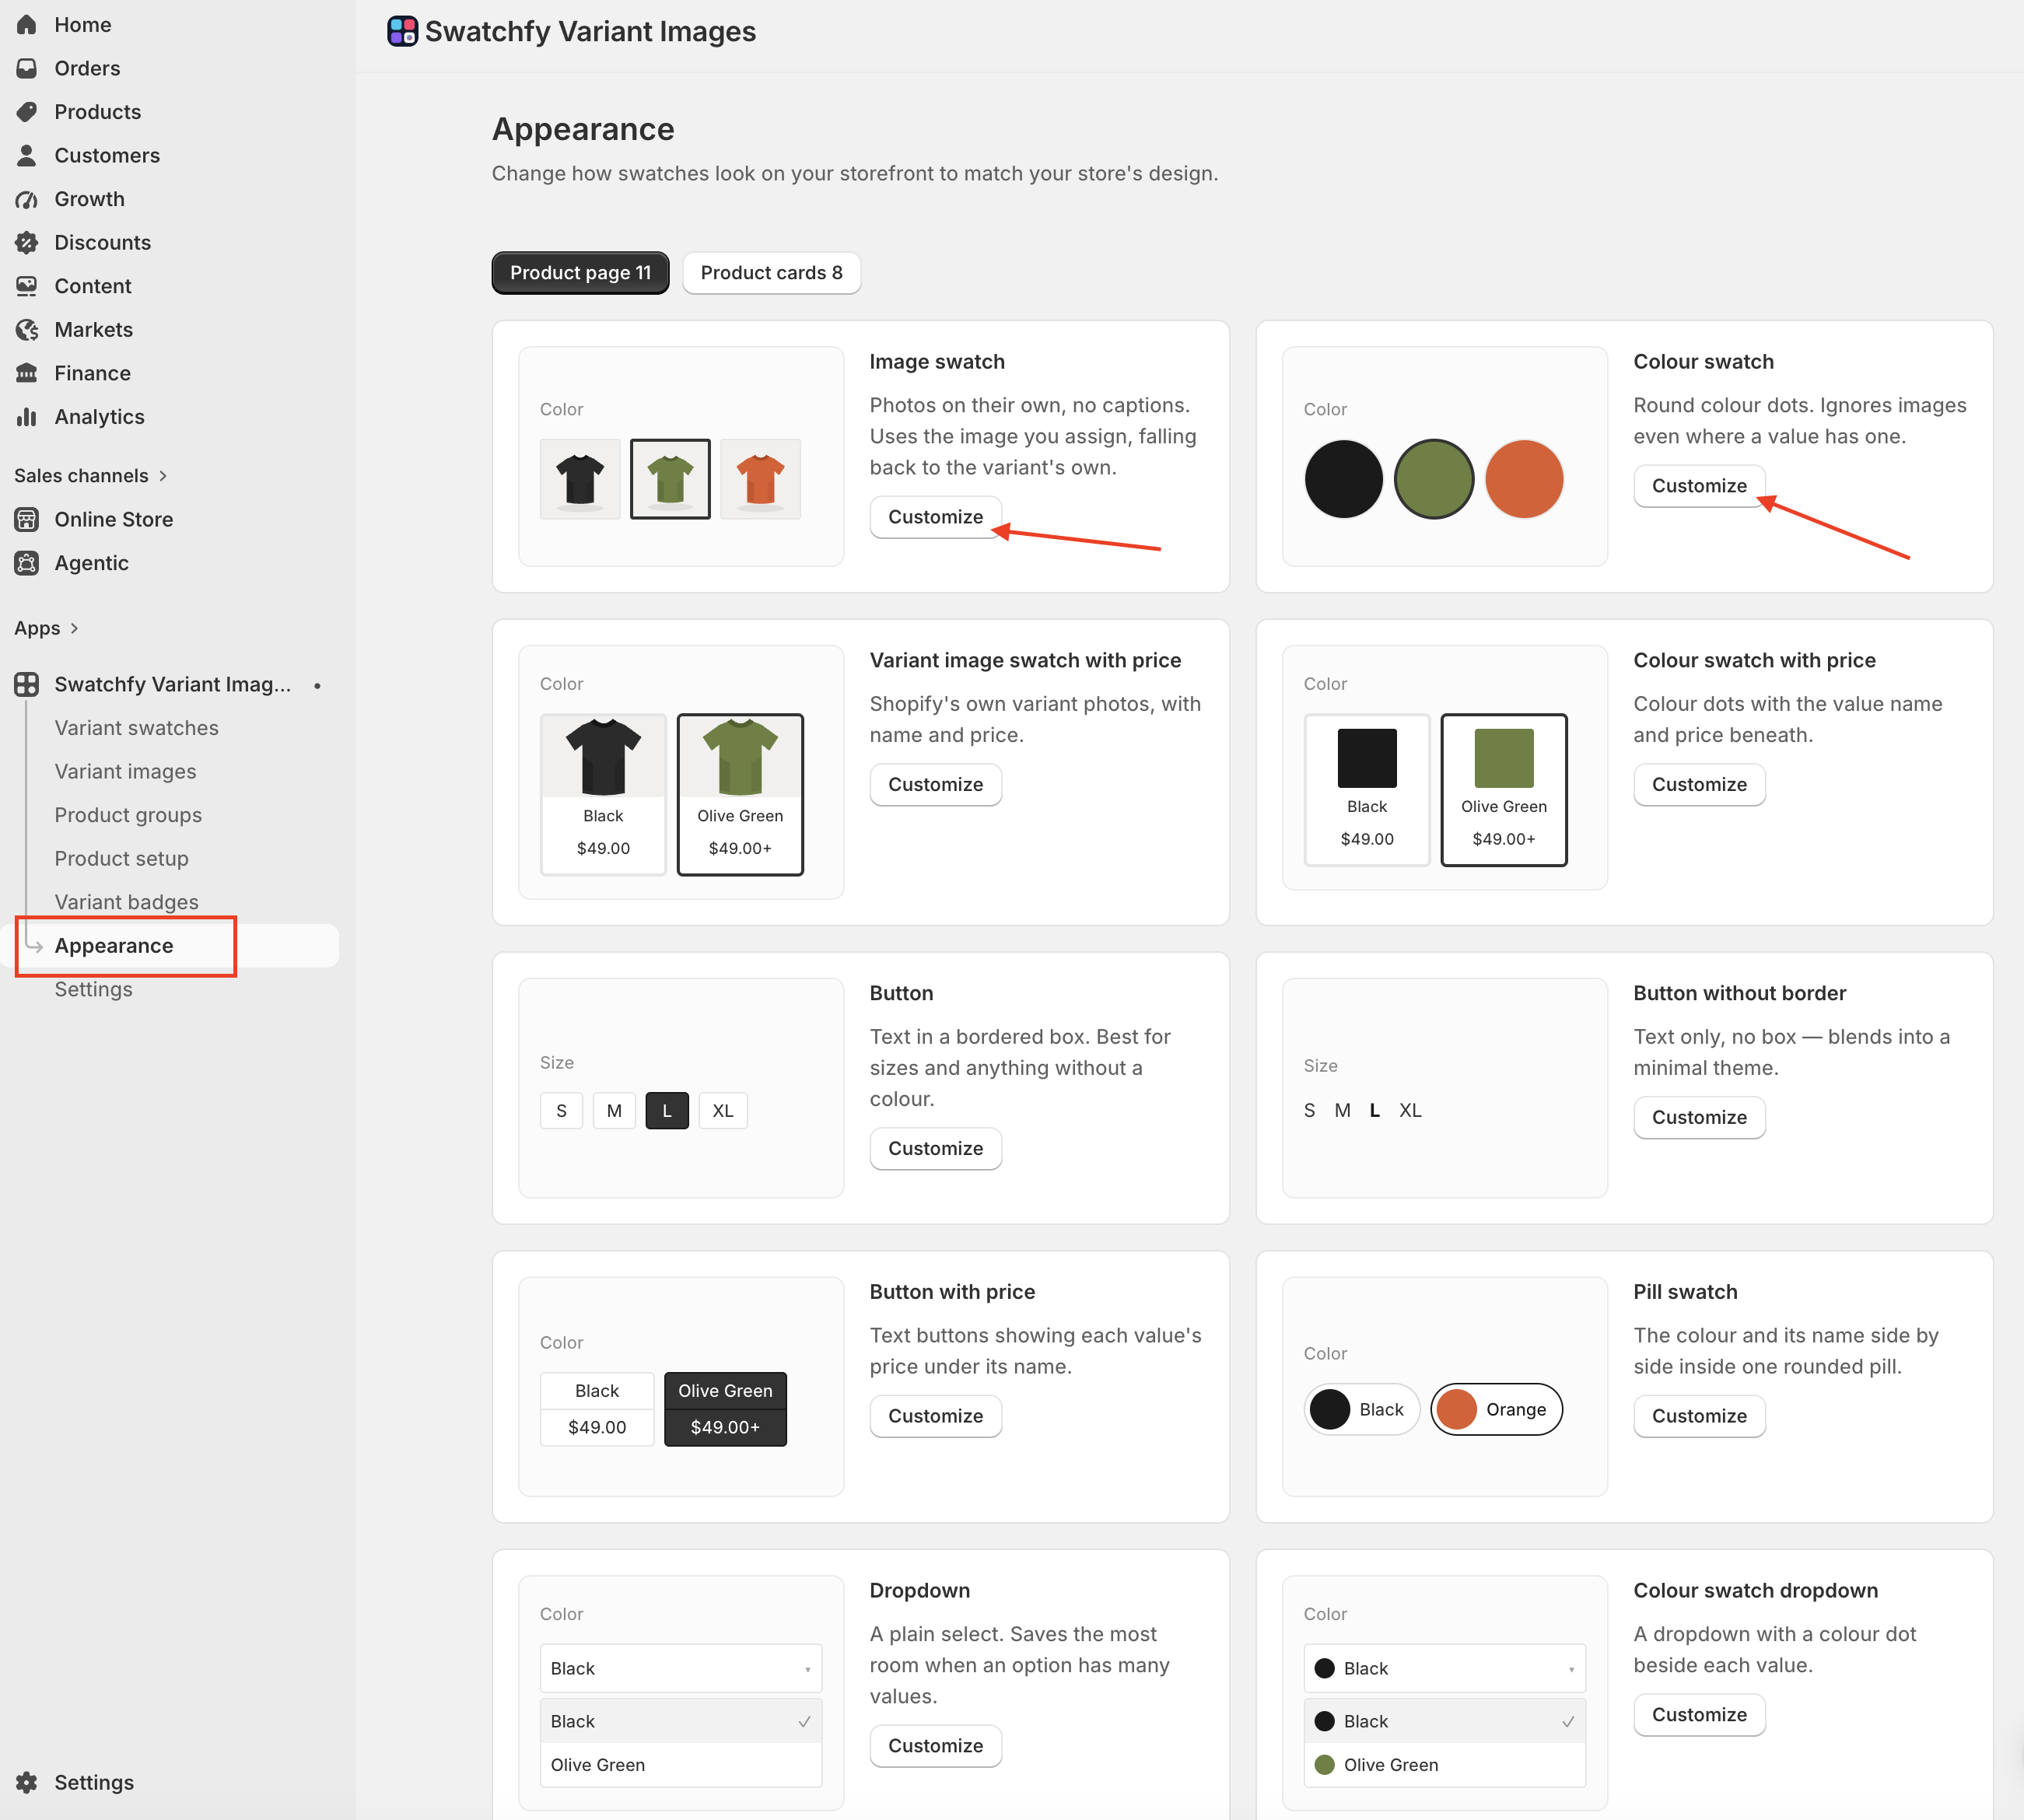
Open the Appearance page. Each swatch style (Colour swatch, Image swatch, Button, Dropdown…) has its own Customize page.
At the top, switch between Product page and Product cards. They are styled separately. Copy from product page and Copy from product card sync one to the other.
Pick a Preset as a starting point, then adjust Shape, Size, border width and colour, spacing and labels. The Preview updates as you go.
Click Save. Nothing is applied until you do.
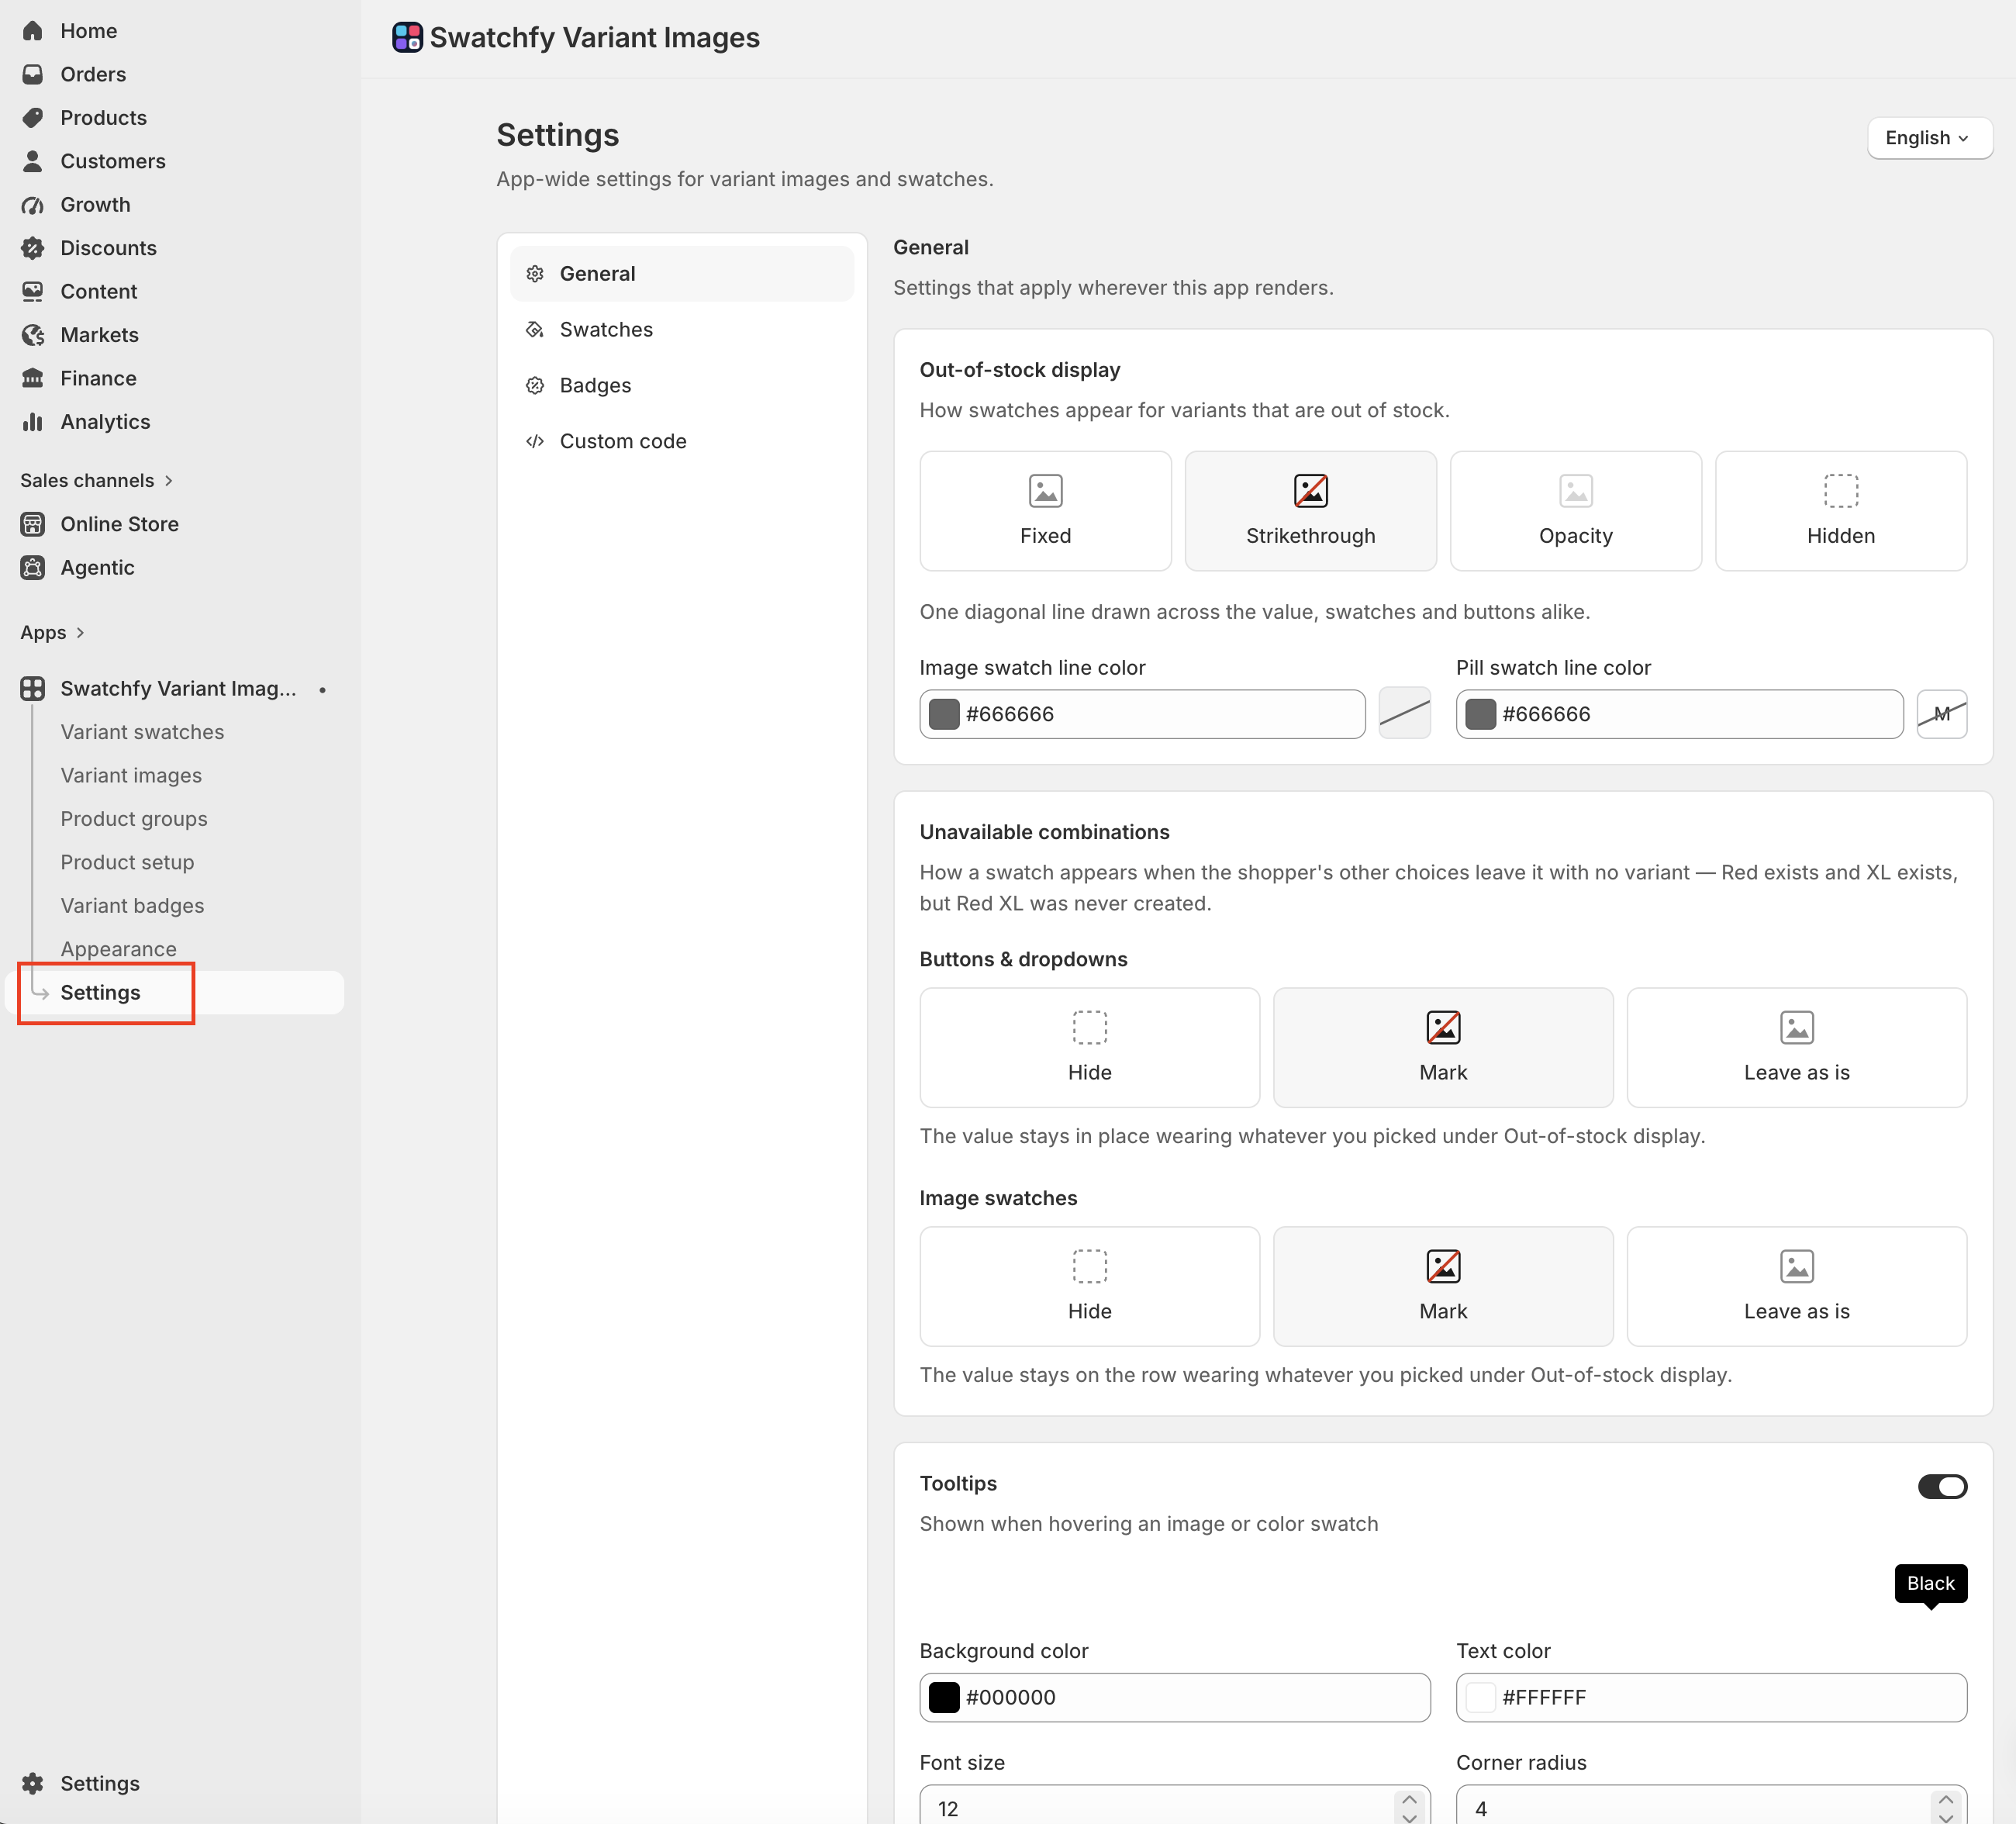
The Settings page carries the behaviour that is not about looks: Out-of-stock display, Unavailable combinations, Tooltips, Option label settings, Product card swatches (click, tap and hover behaviour on collection cards) and Apply to (limit the app to tagged products). If you need something the controls do not cover, Settings › Custom code › Custom CSS is injected after the app's own stylesheet. Swatch rows use the swatchfy-swatches class, and each swatch is a swatchfy-swatch-item.
Open a product page with variants and switch between values. The gallery should show only that value's photos, and the option should render as the swatch type you chose.
Open a collection page if you set a Collection page display for any option.
Back in the Setup guide, click Works Great to finish. If something is off, click I don't see it and a chat opens with our team, with your store details already attached.
If you are not sure whether something on the page is caused by Swatchfy, add ?stop_swatchfy=true to the product URL. That stops the app's scripts on that page load only, so you can compare.
Use the chat bubble in the app, or email [email protected] with your store URL and, if possible, a link to the product page in question. That helps us reproduce the issue quickly.